This guide will take you through the steps to take a screenshot of your phone screen. Great for sharing with family, friends and Ciz ICT for IT support!
1. Apple IOS
The following steps for taking a screenshot apply to Apple IOS only. For Android, scroll to the second section of this document.
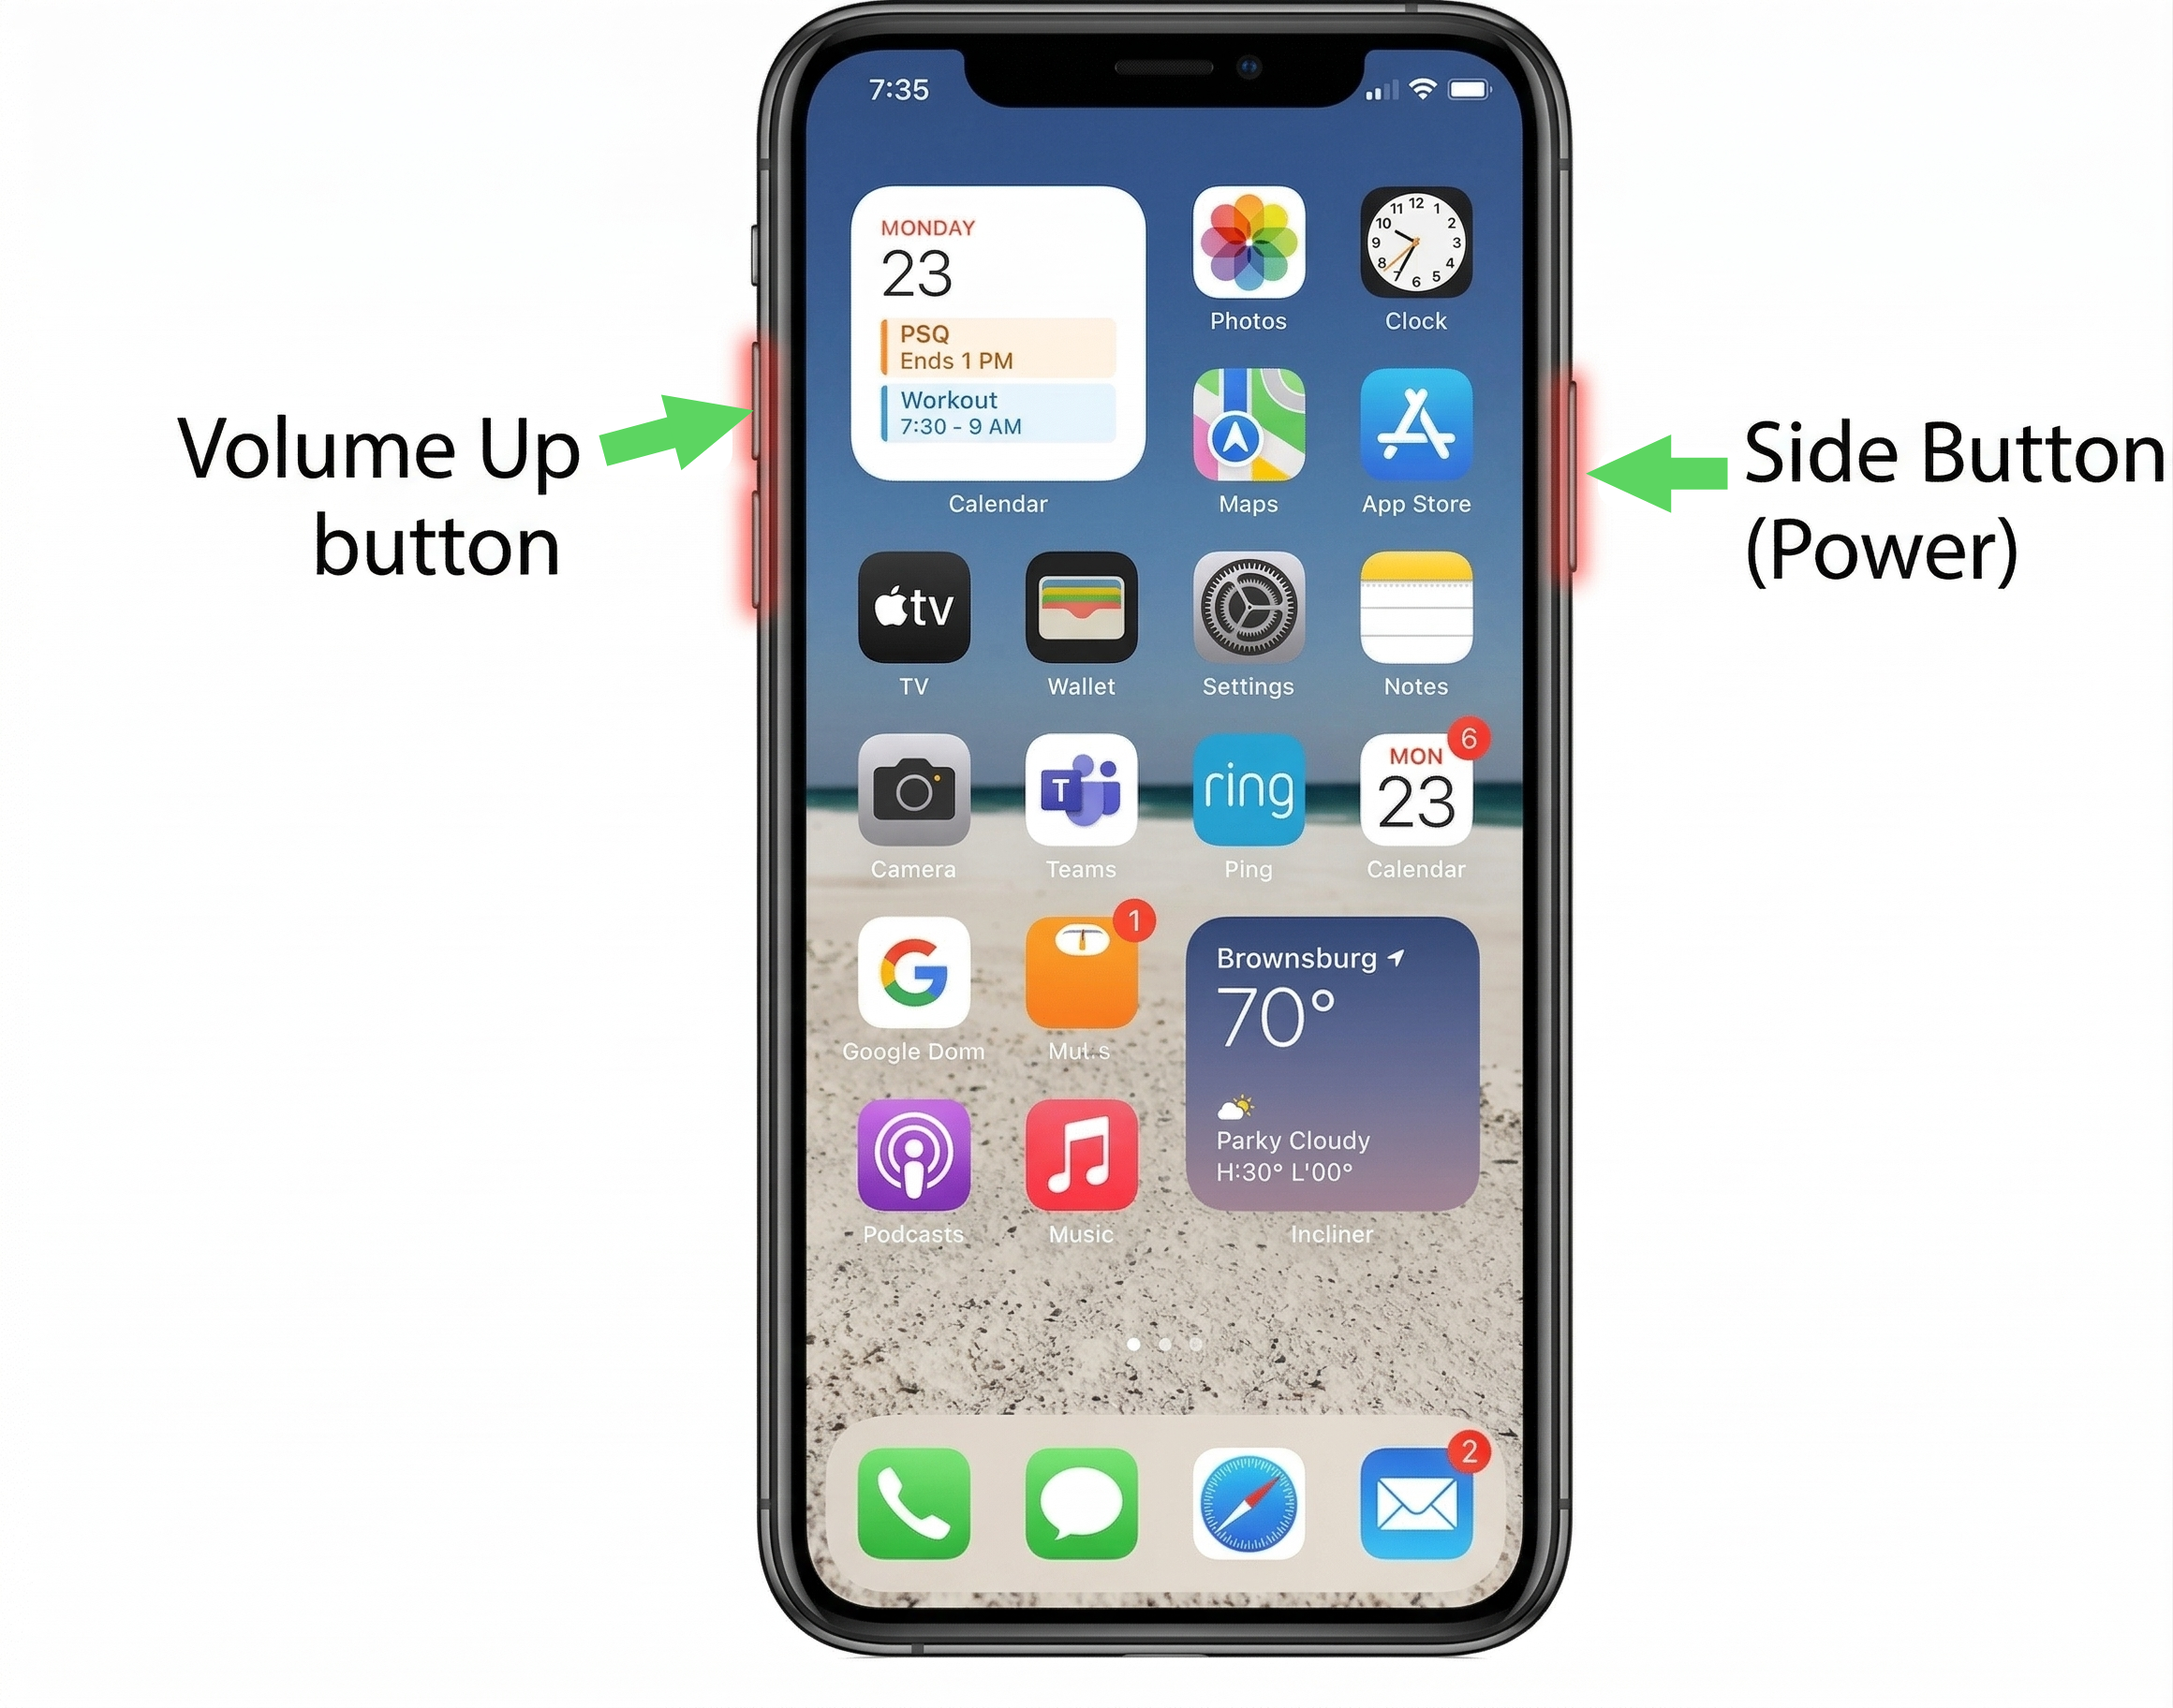
1.1. Take screenshot
- Press the Power button and the Volume Up button at the same time to take a screenshot of your screen
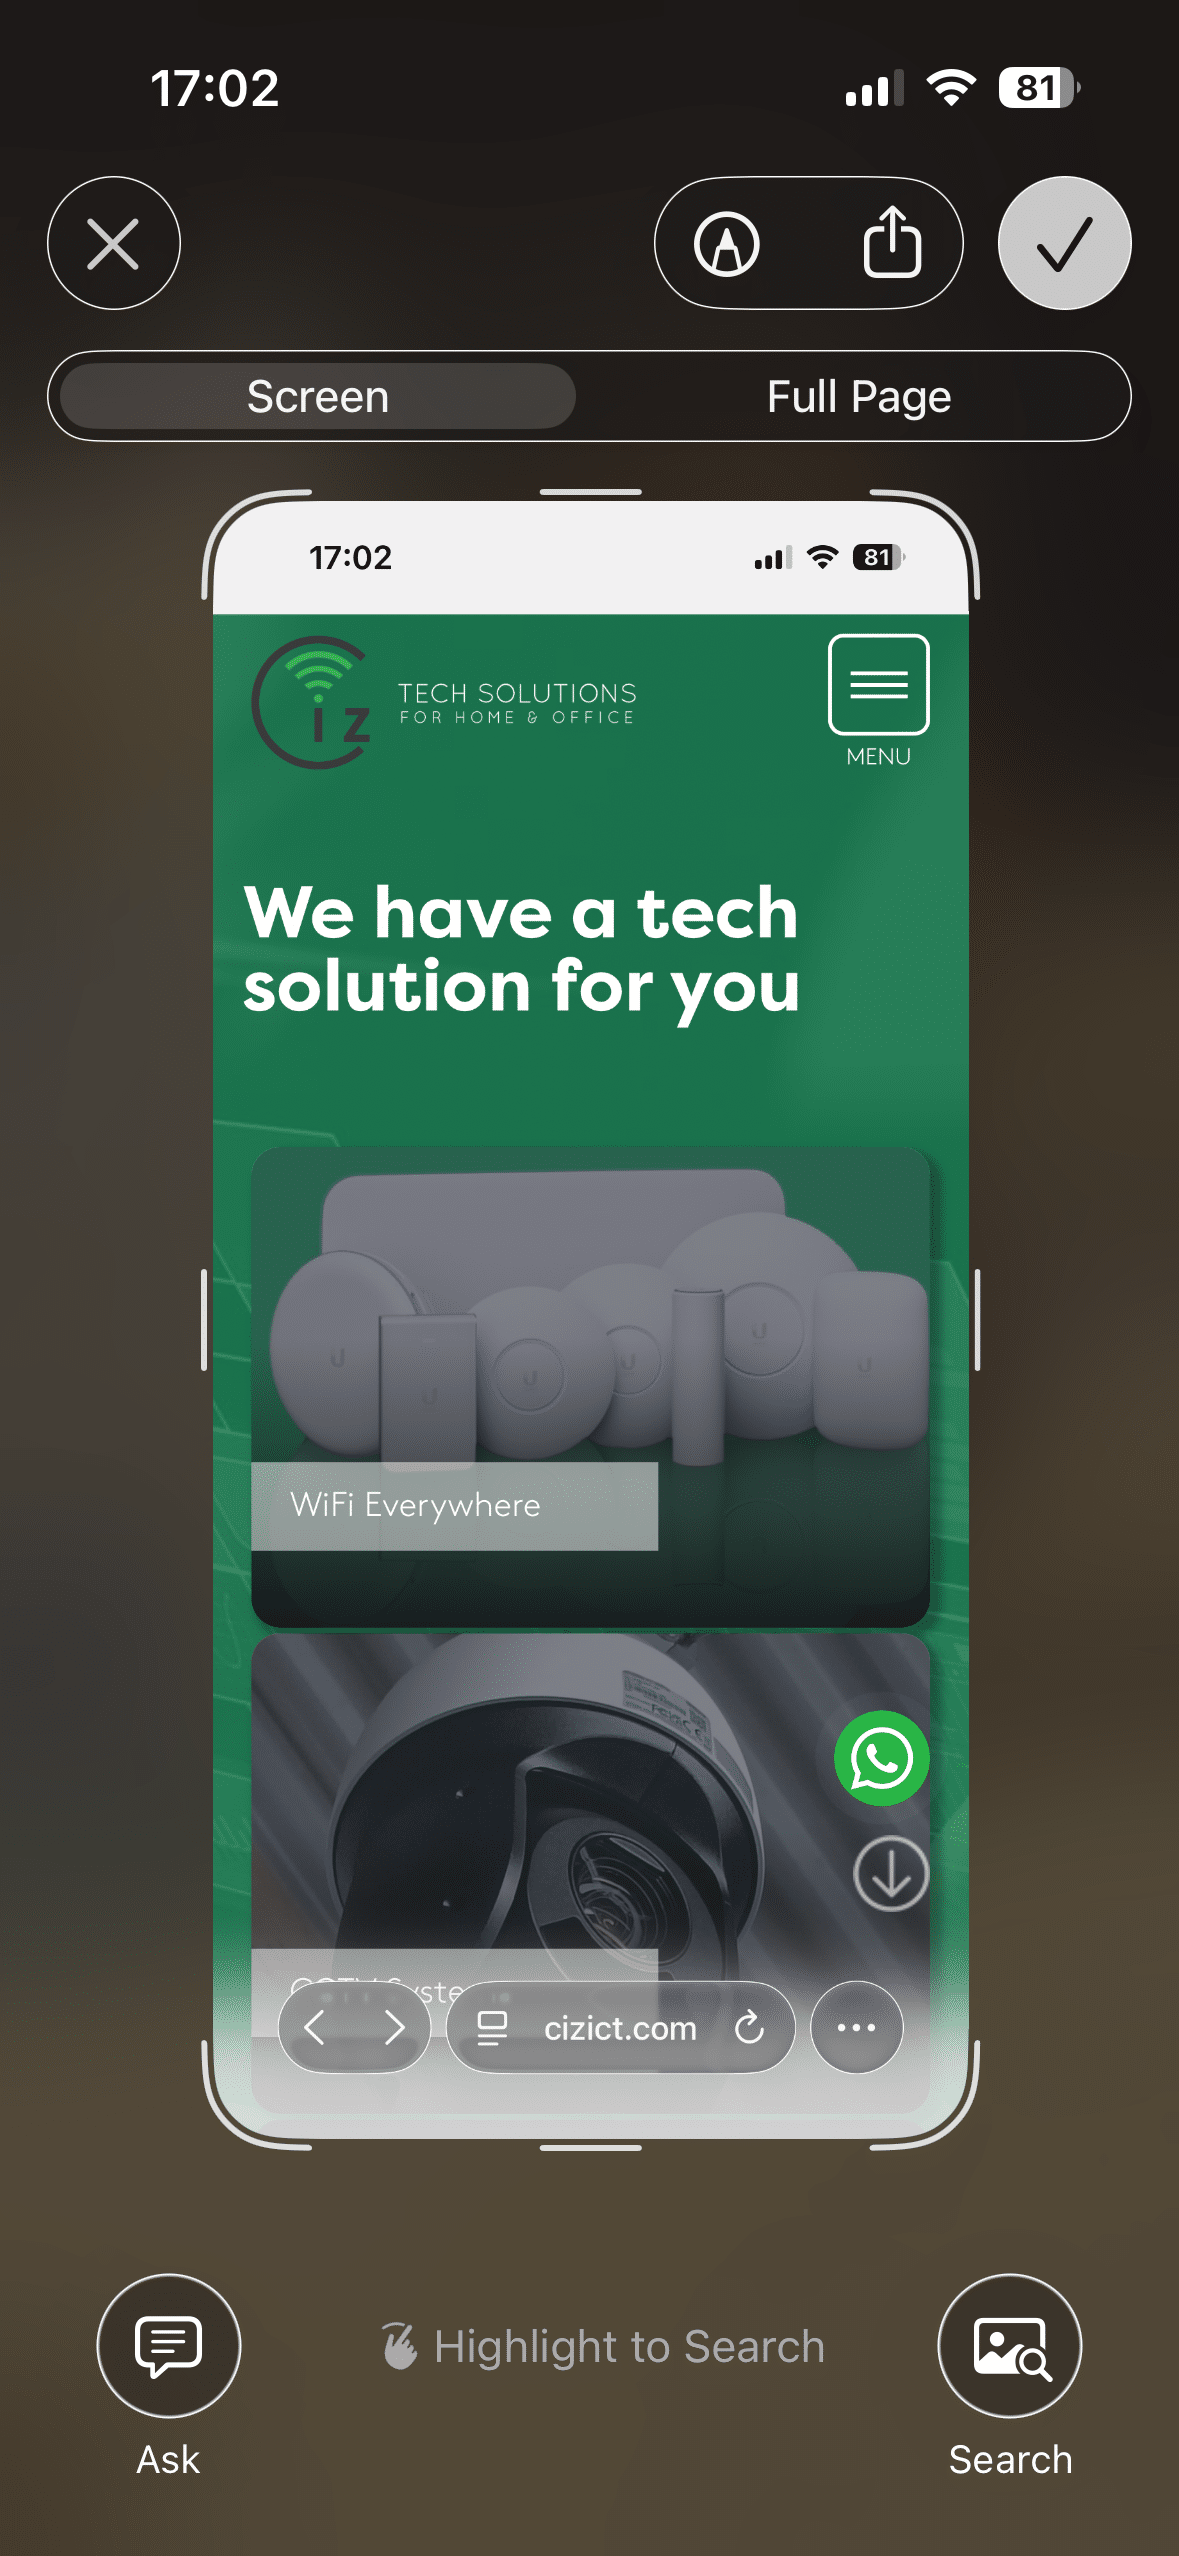
1.2. Screenshot Preview
Once you have taken a screenshot, you will see a preview.
Here you will get the option to edit/save/share the screenshot.
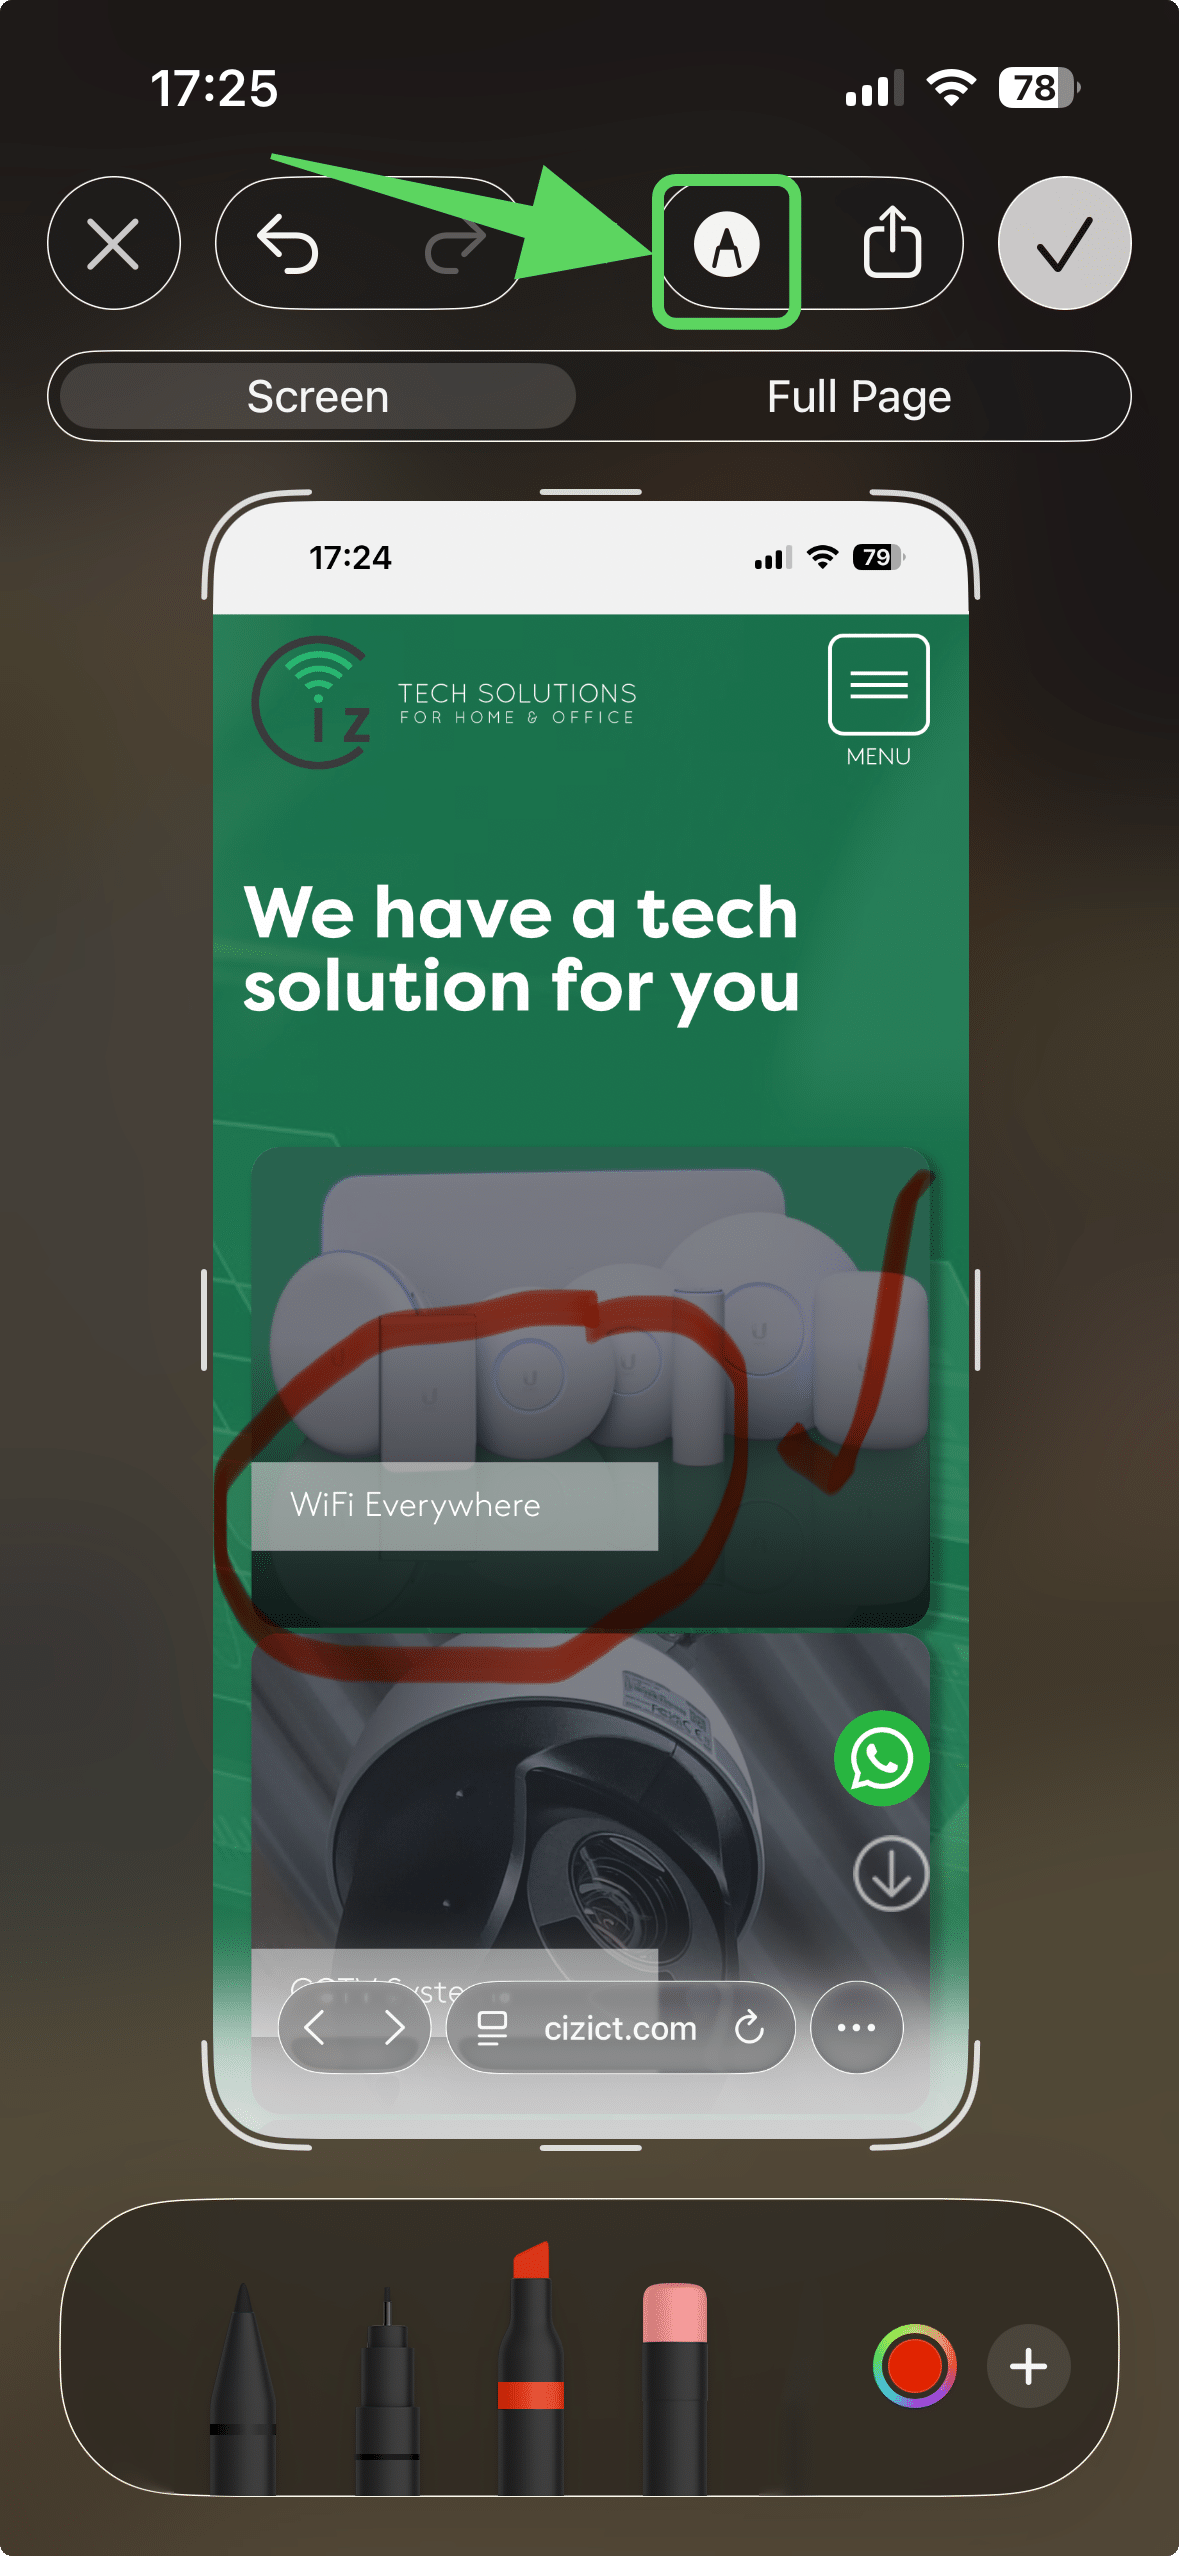
1.3. Edit the image
Once you have taken a screenshot, you will have the option of editing the image:
- Click on the Pen icon highlighted in the image
- Select the marker type and colour
- Draw with your finger
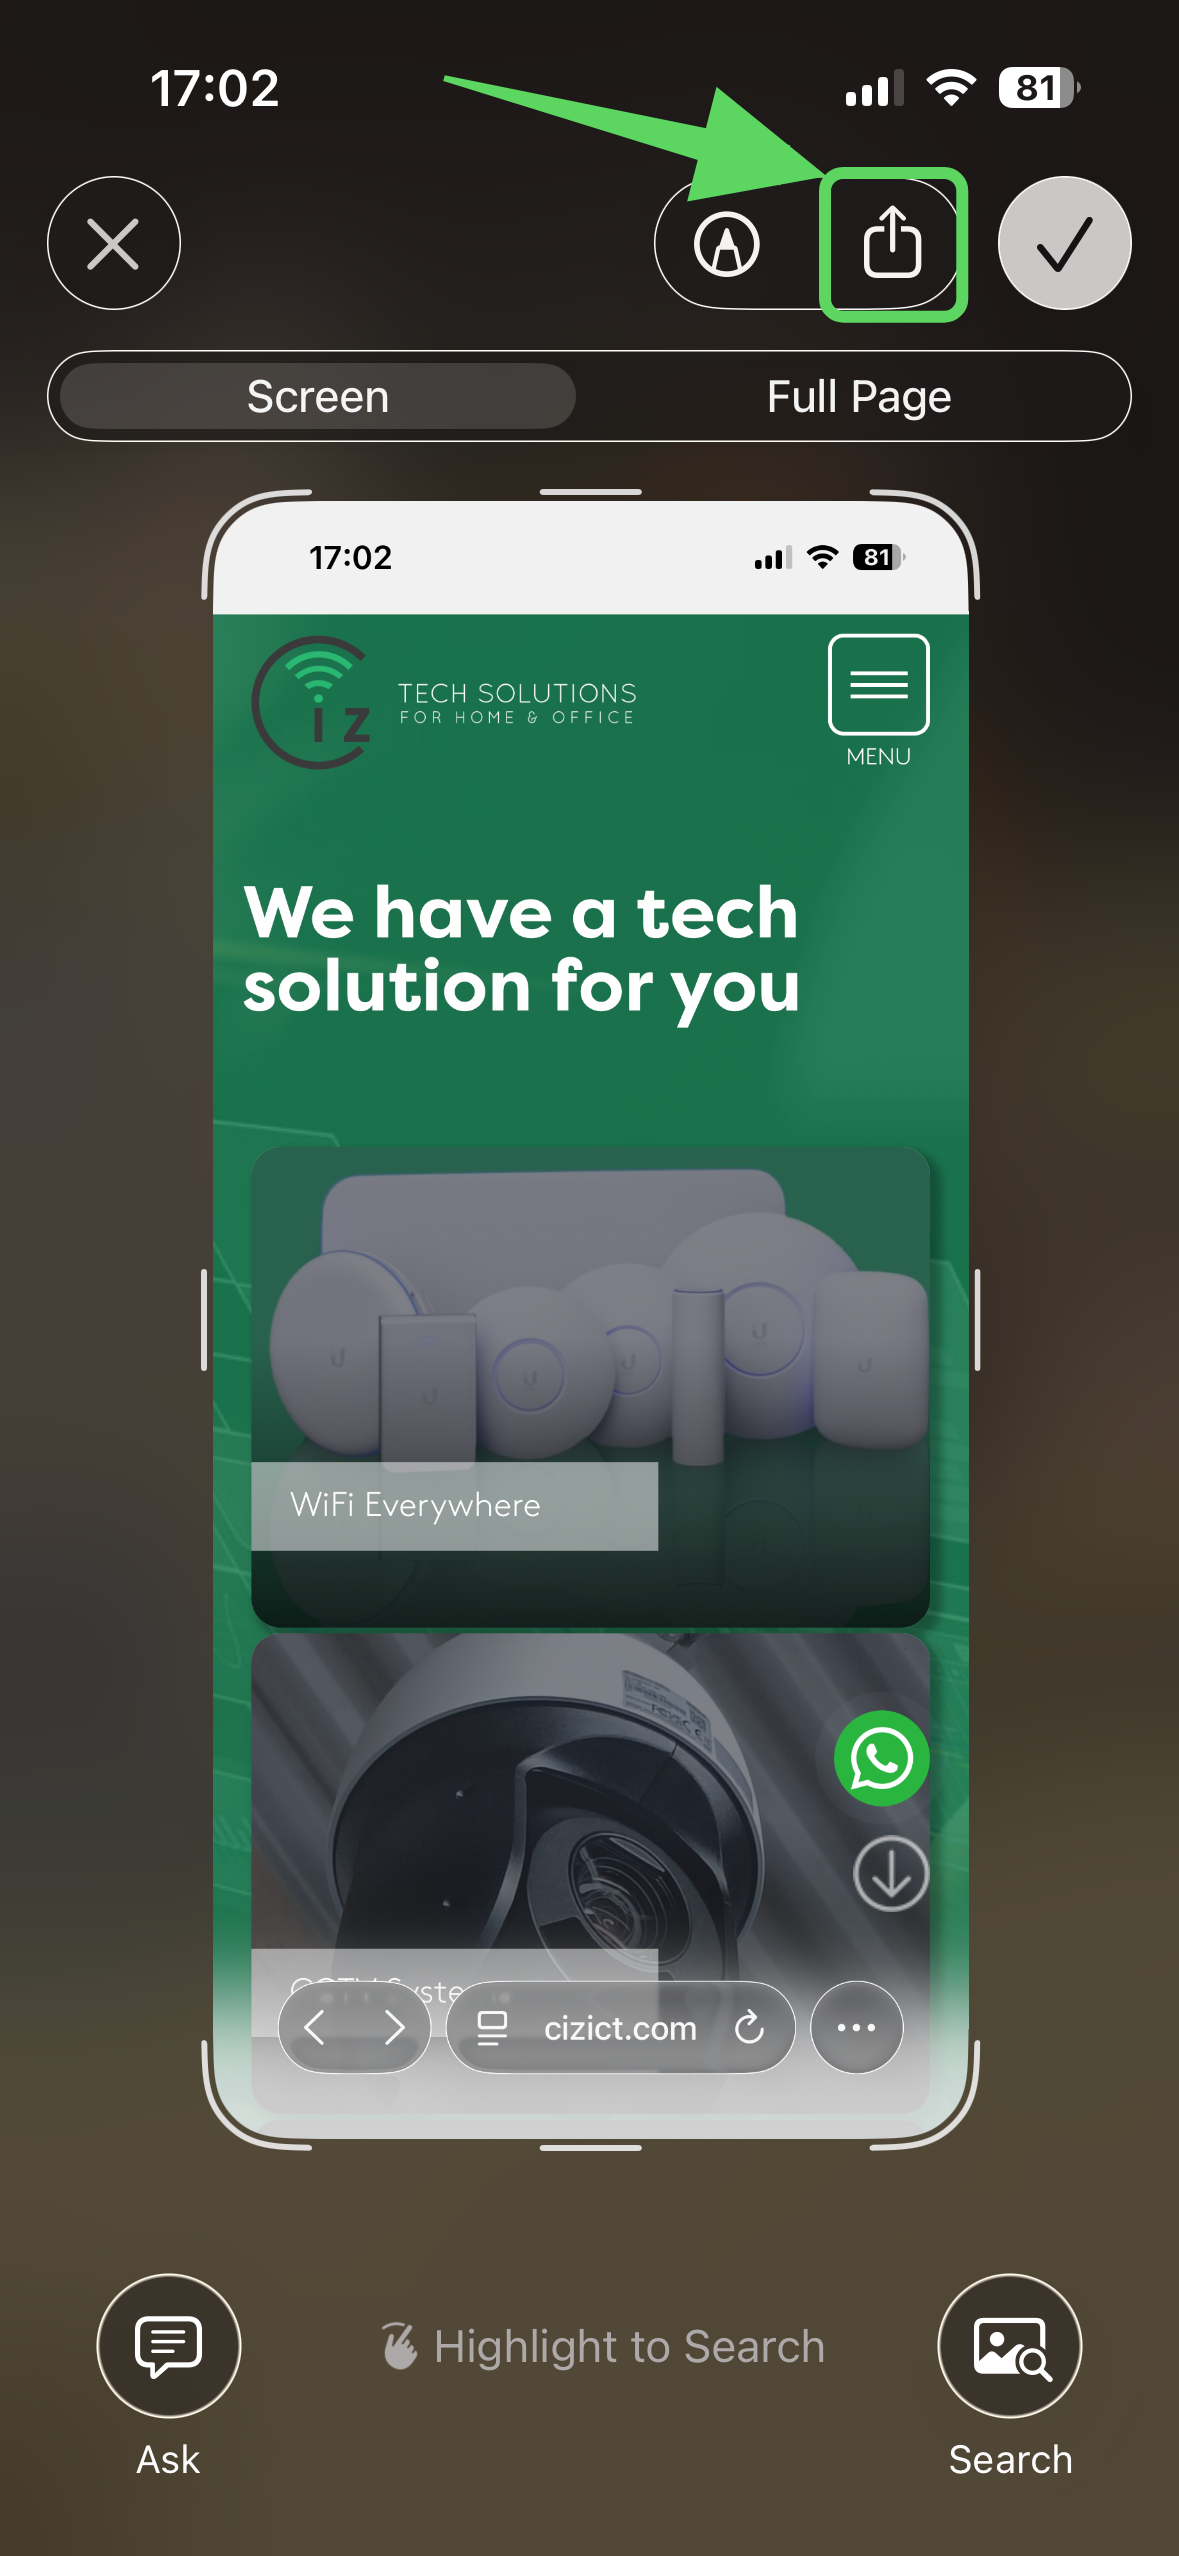
1.4. Share the Image
You can share the screenshot without saving the file. To do so:
- Click on the Share icon (highlighted)
- Select the means by which you want to share (e.g. WhatsApp, Email etc.)
- Select the contact, then share.
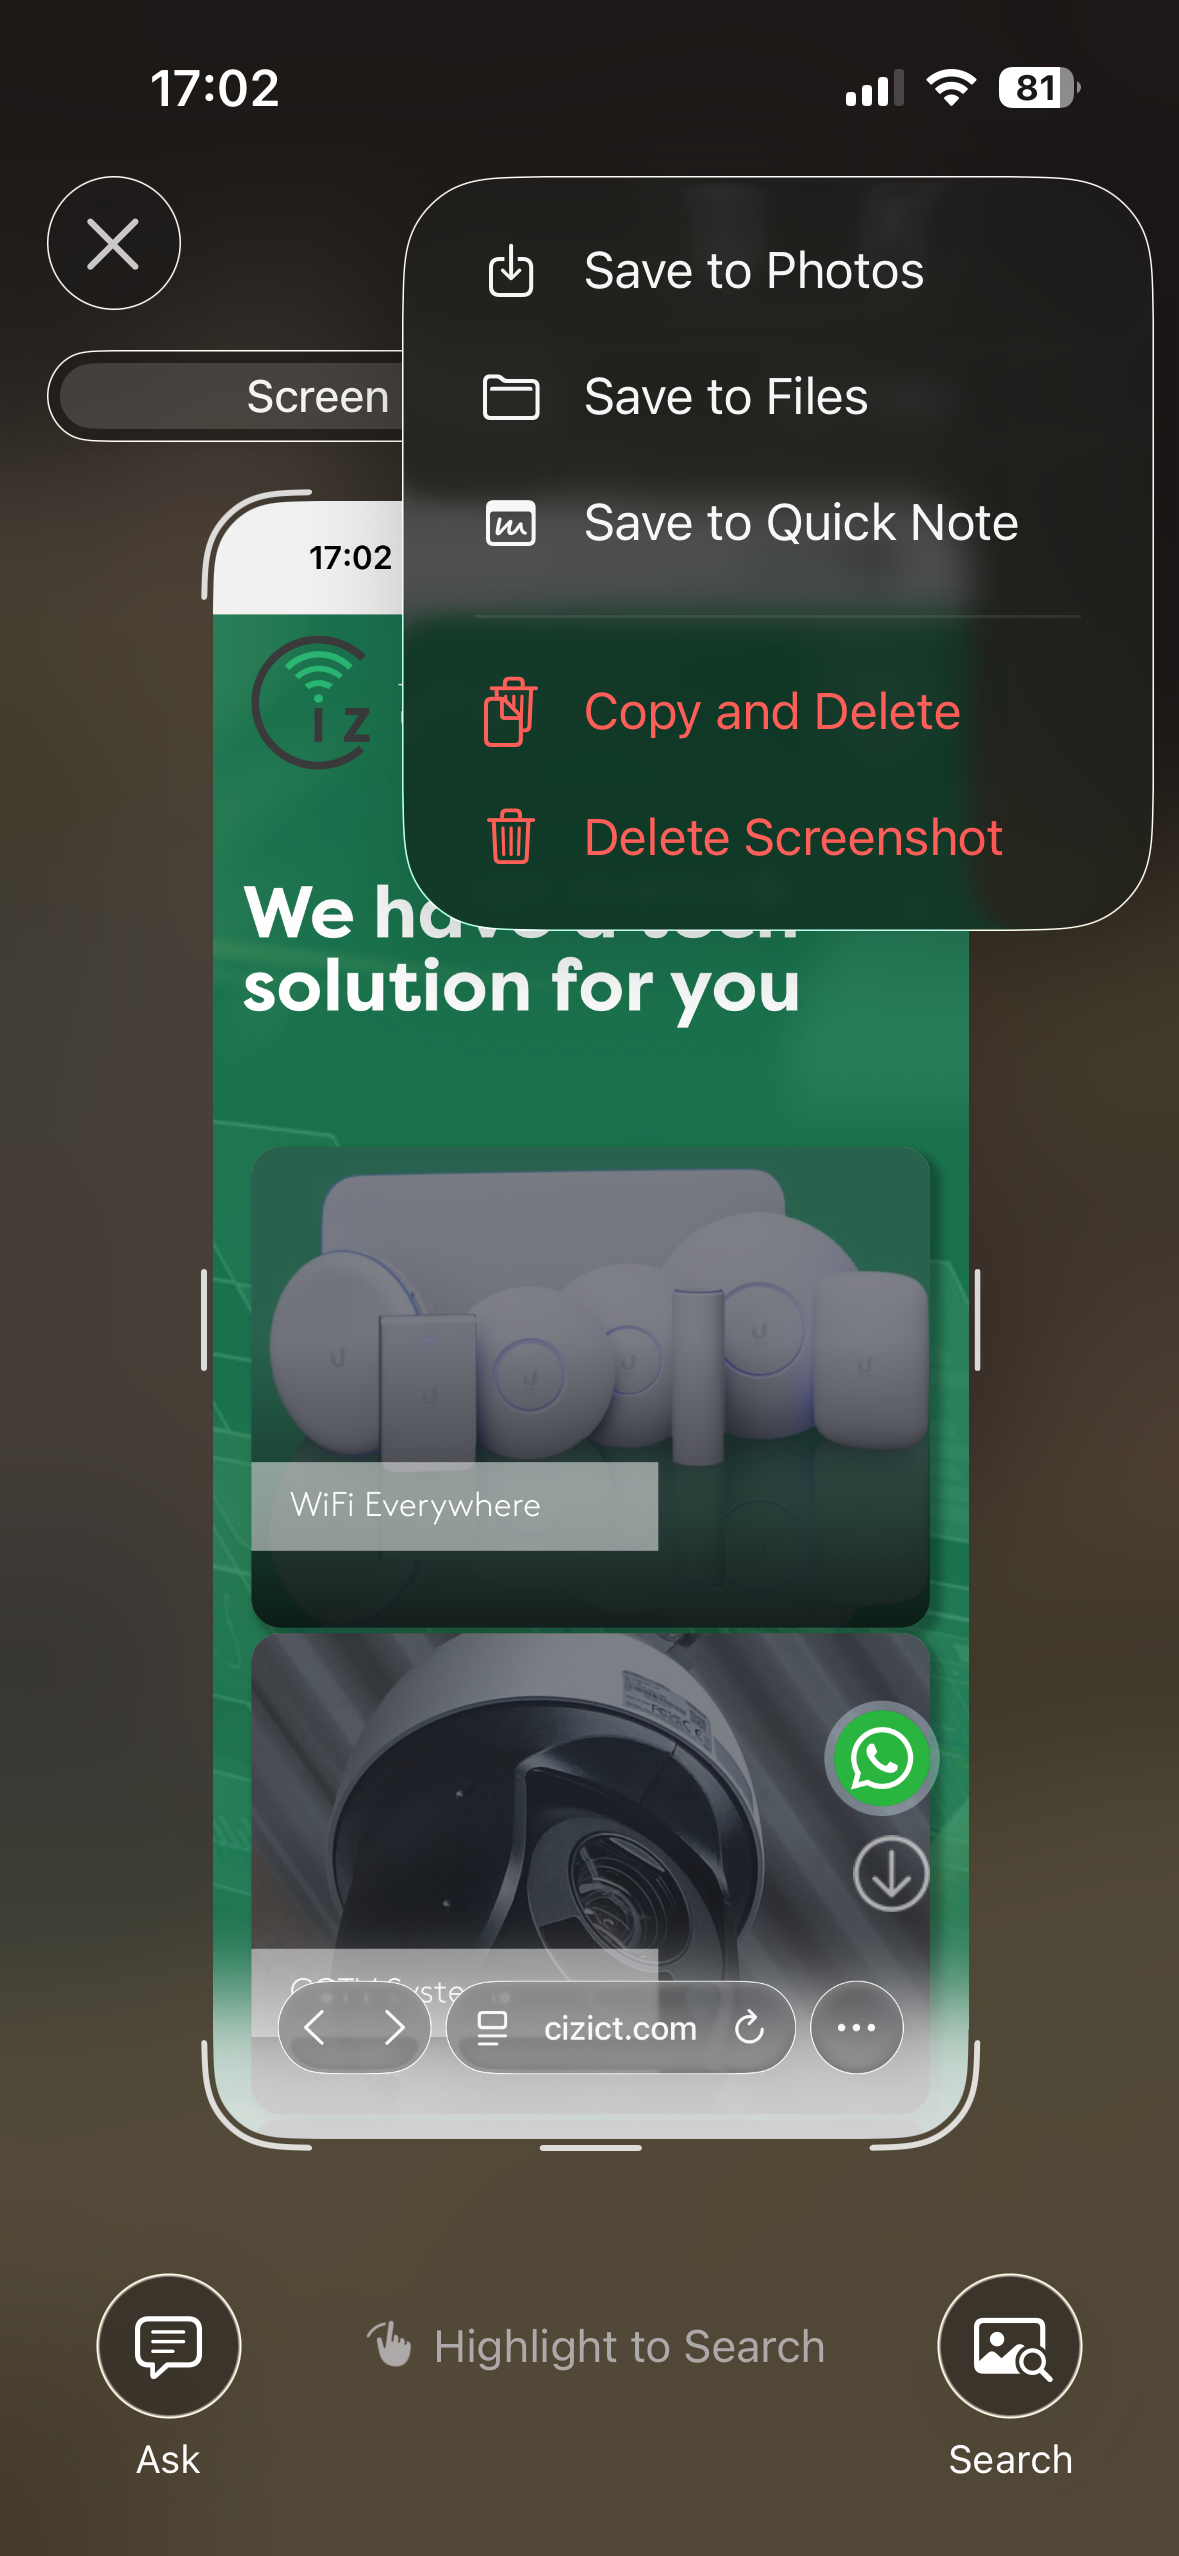
1.5. Save Screenshot
You can save the screenshot to your phone to share later. To do so:
- Click on the Tick icon (highlighted in the image)
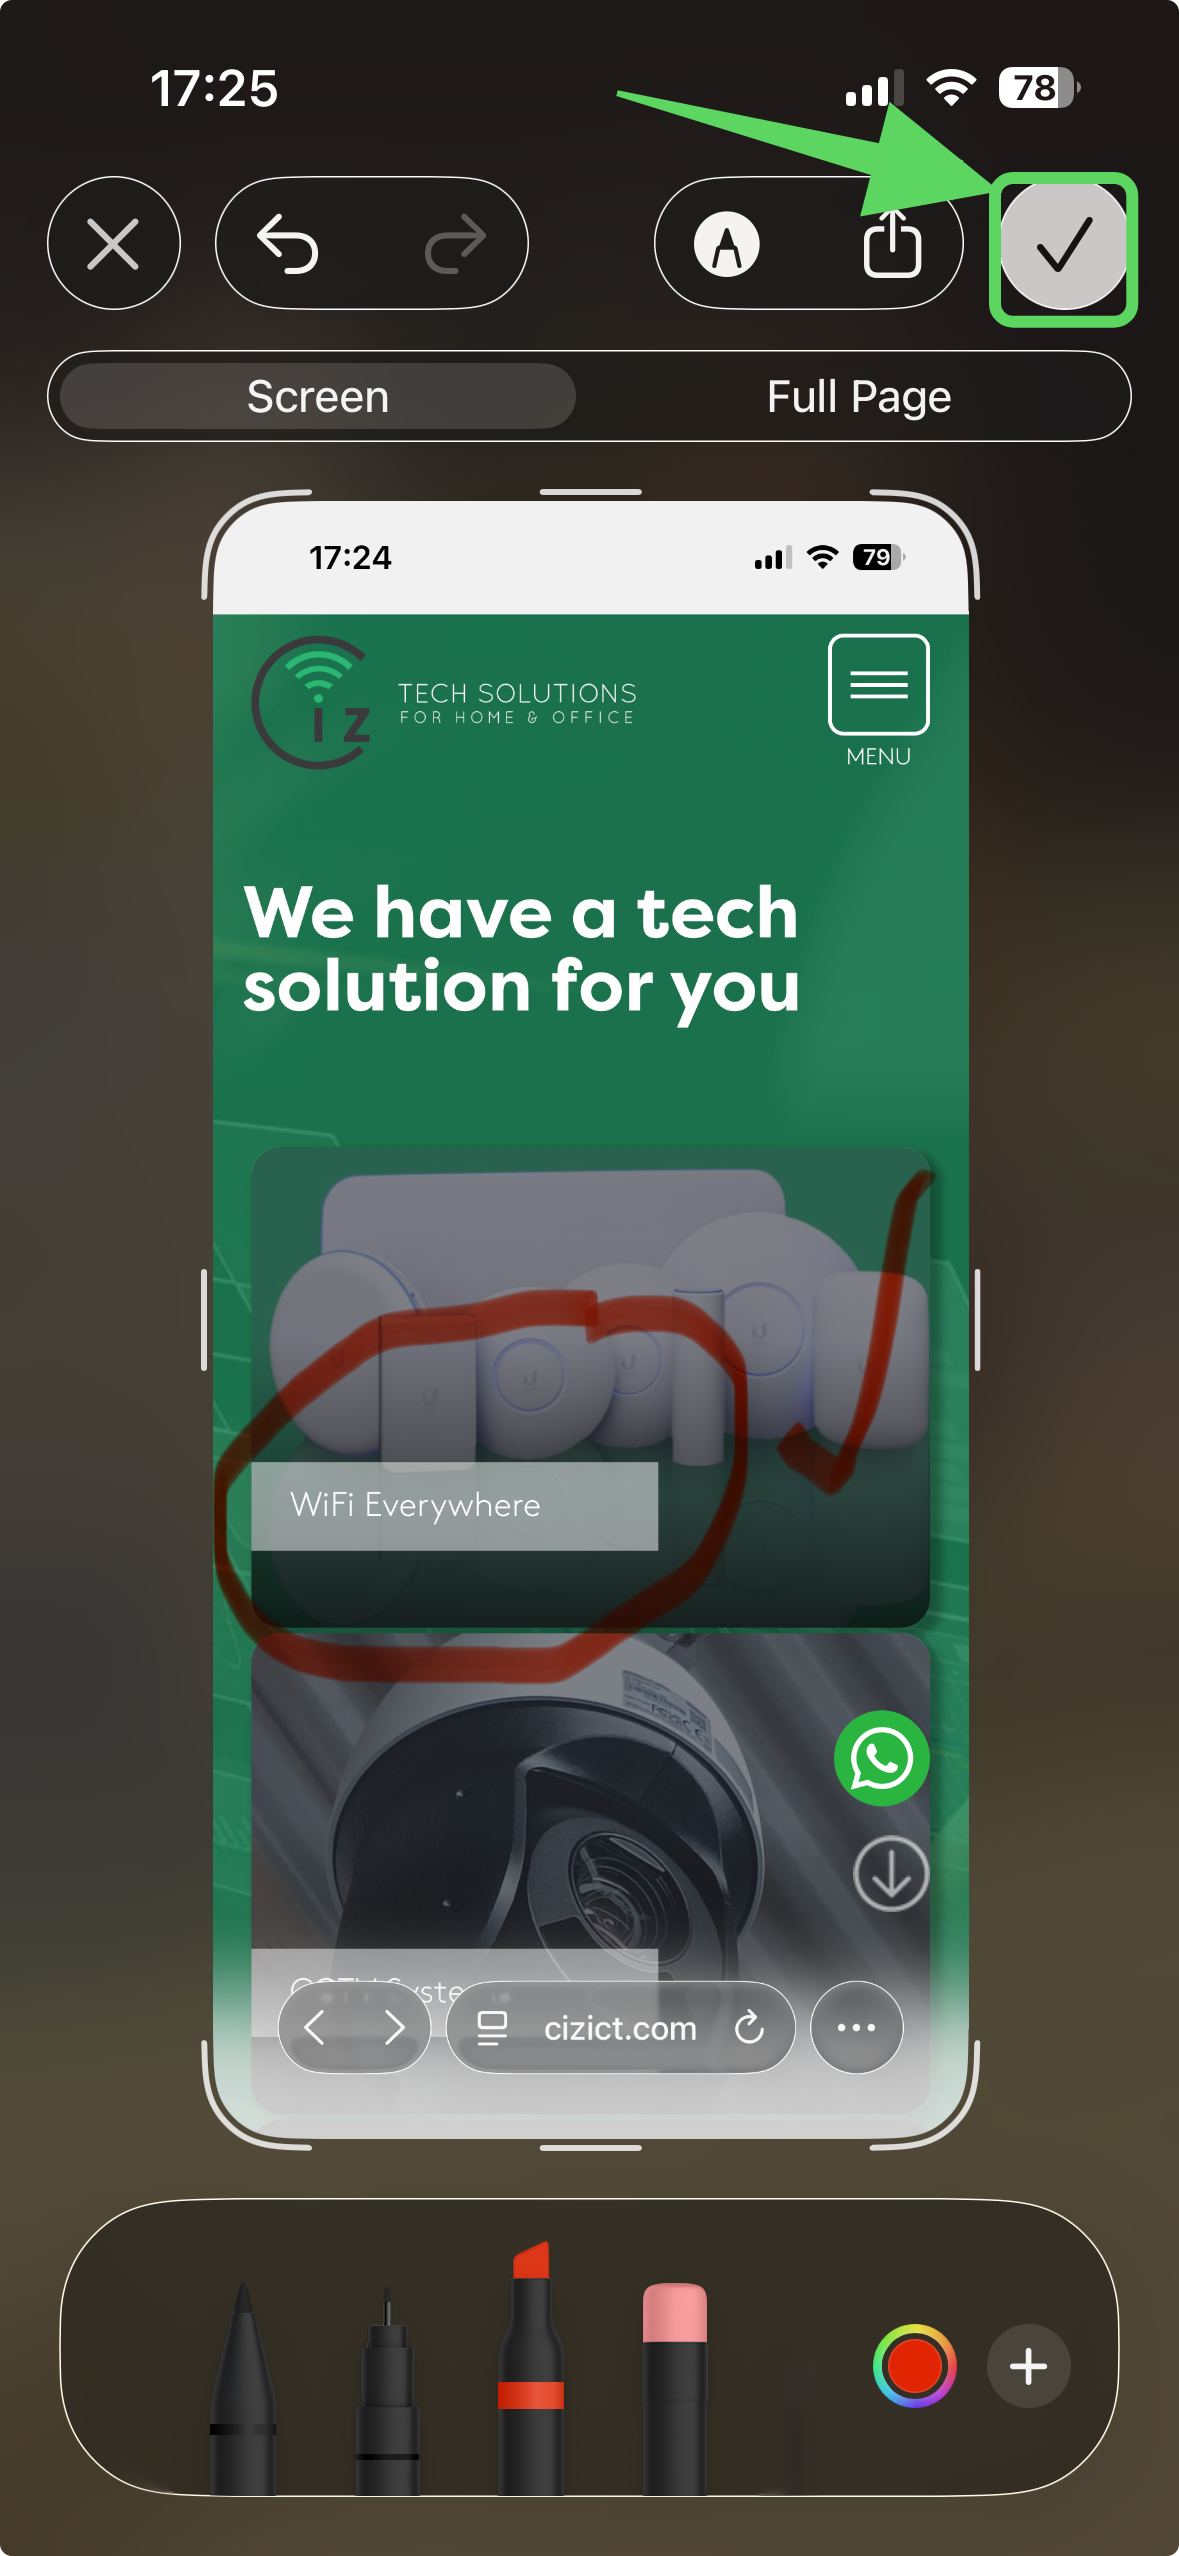
1.5.1. Save Location
...then select where you would like to save the screenshot to. For convenience, you can save to Photo's to easily access the screenshot later.
2. Android
The following steps for taking a screenshot apply to Android only.
Please note, due to differences in Android versions, the images contained within might not 100% match what you see on your Android phone.
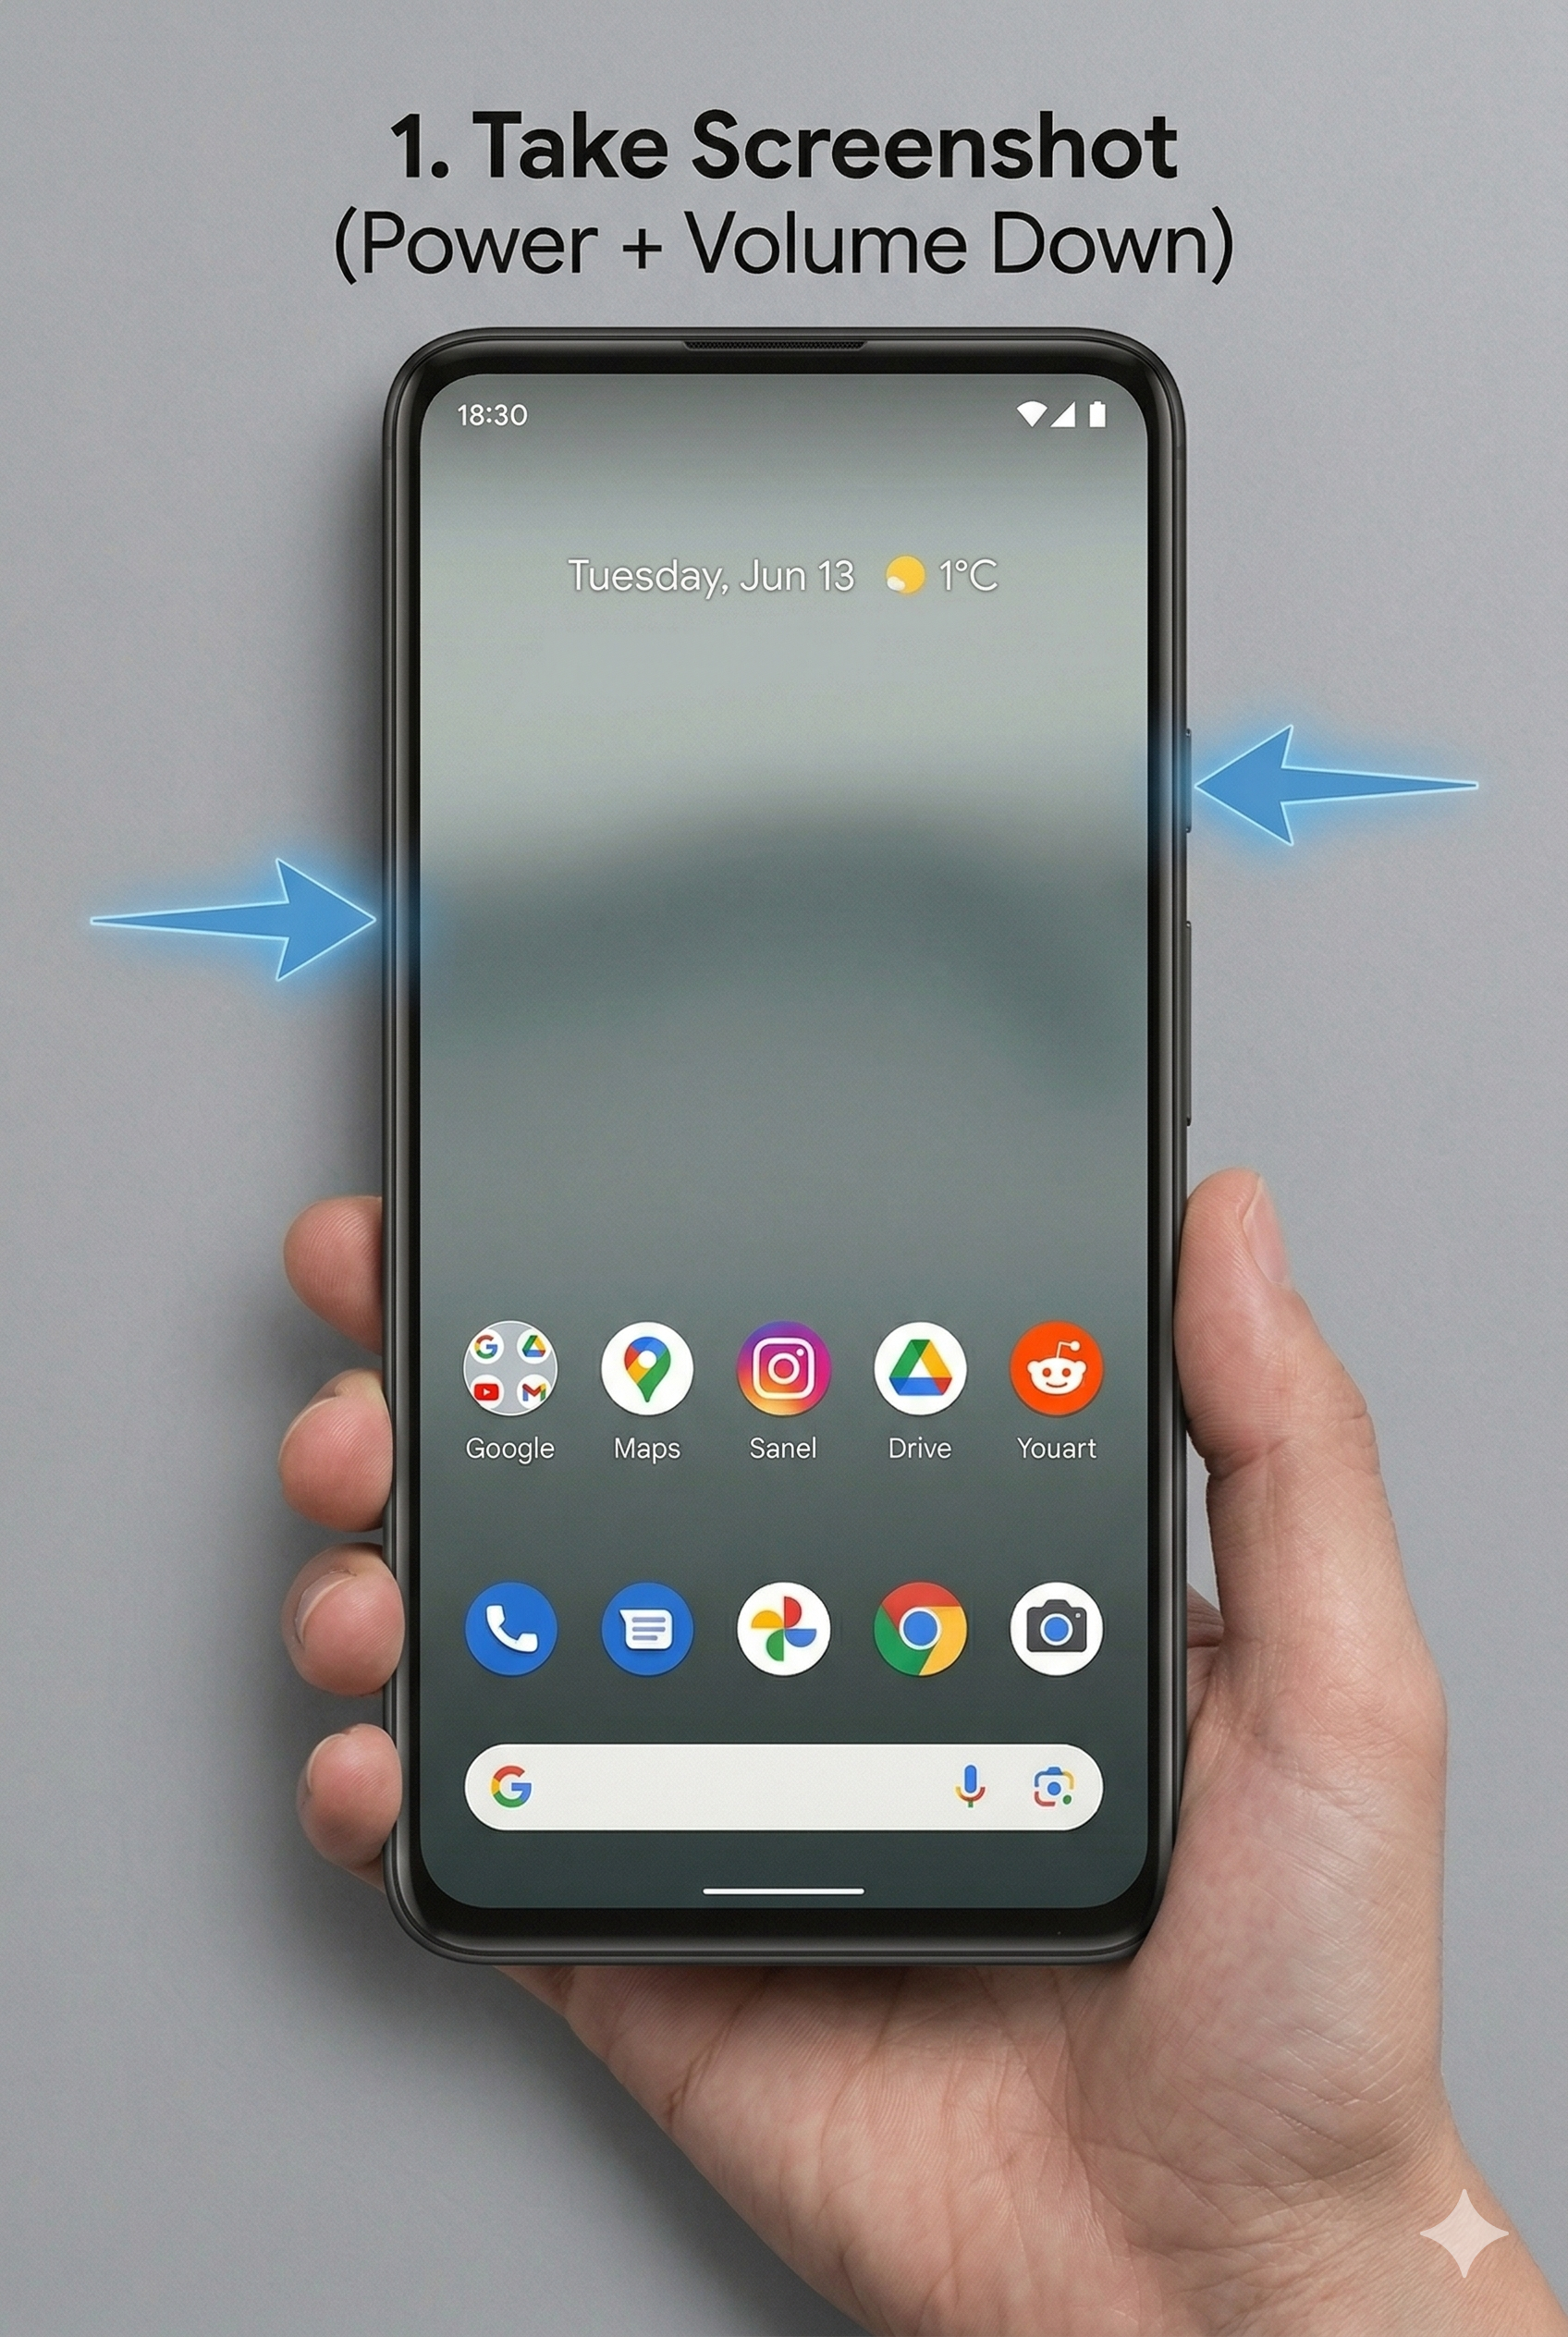
2.1. Take Screenshot
- Simultaneously press the Power button and the Volume Down button. You'll see a brief flash on the screen.
2.2. Screenshot Preview
A floating thumbnail of your capture will appear in the bottom-left. It stays for about 5 seconds before disappearing.
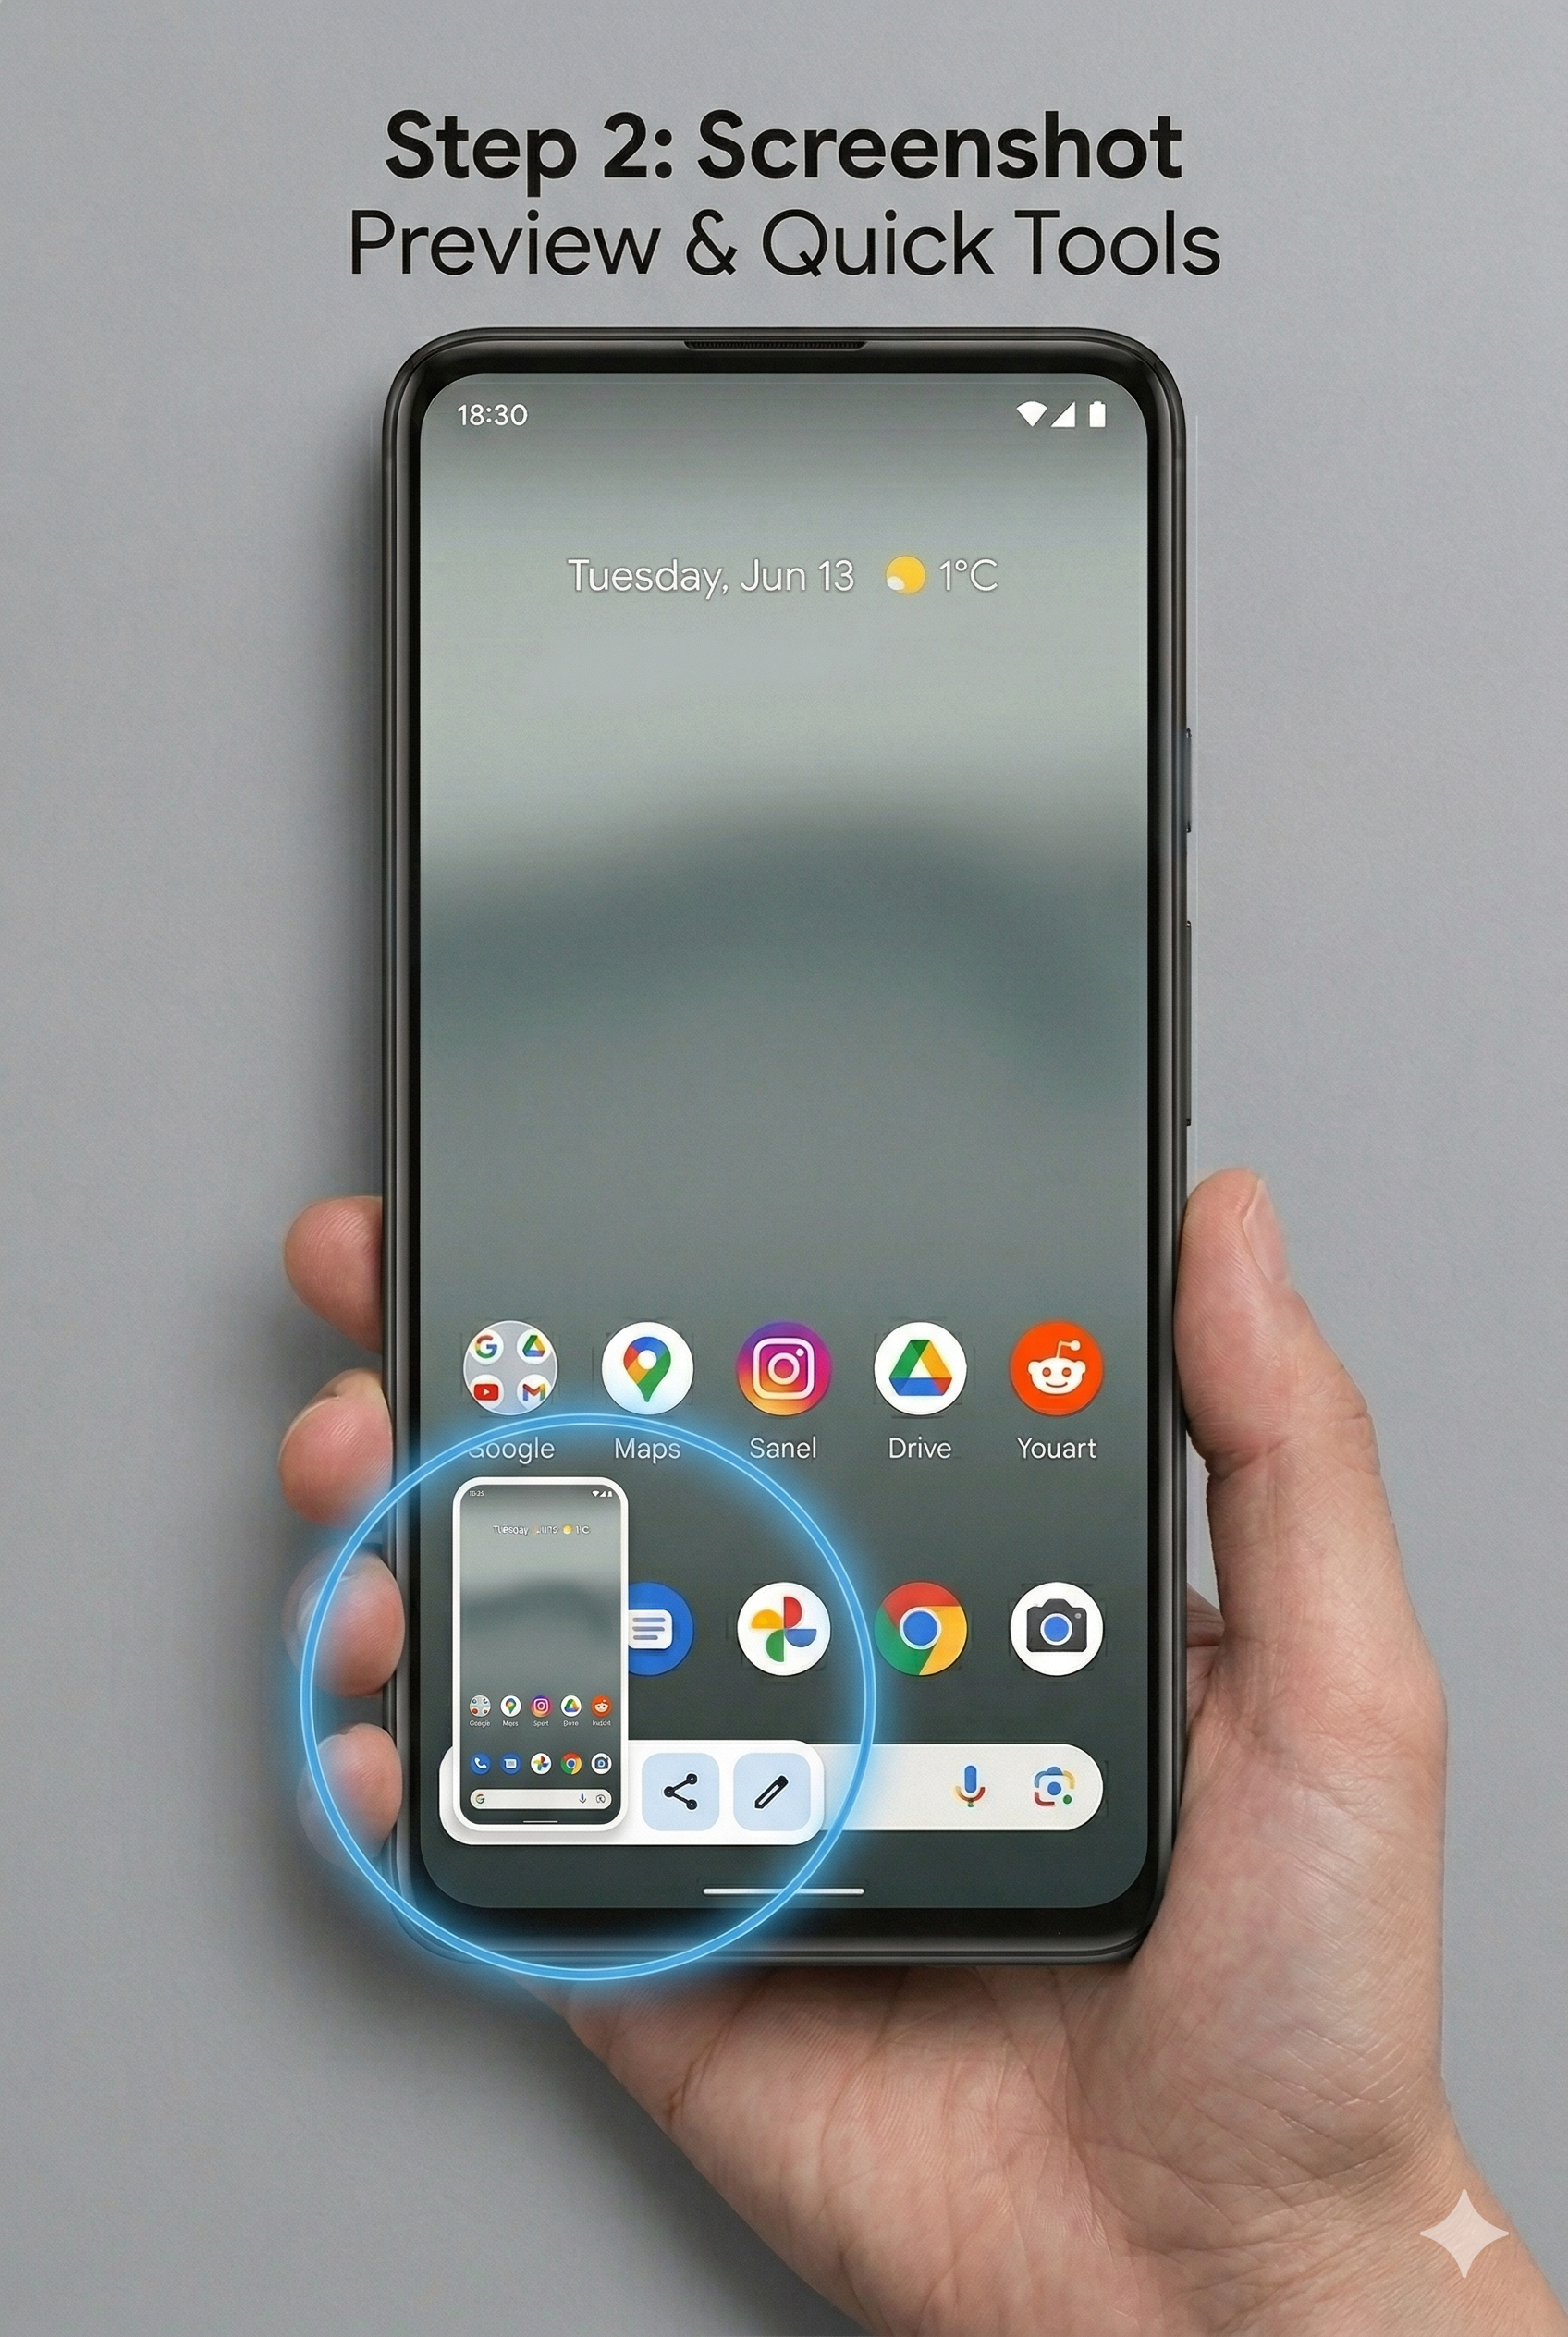
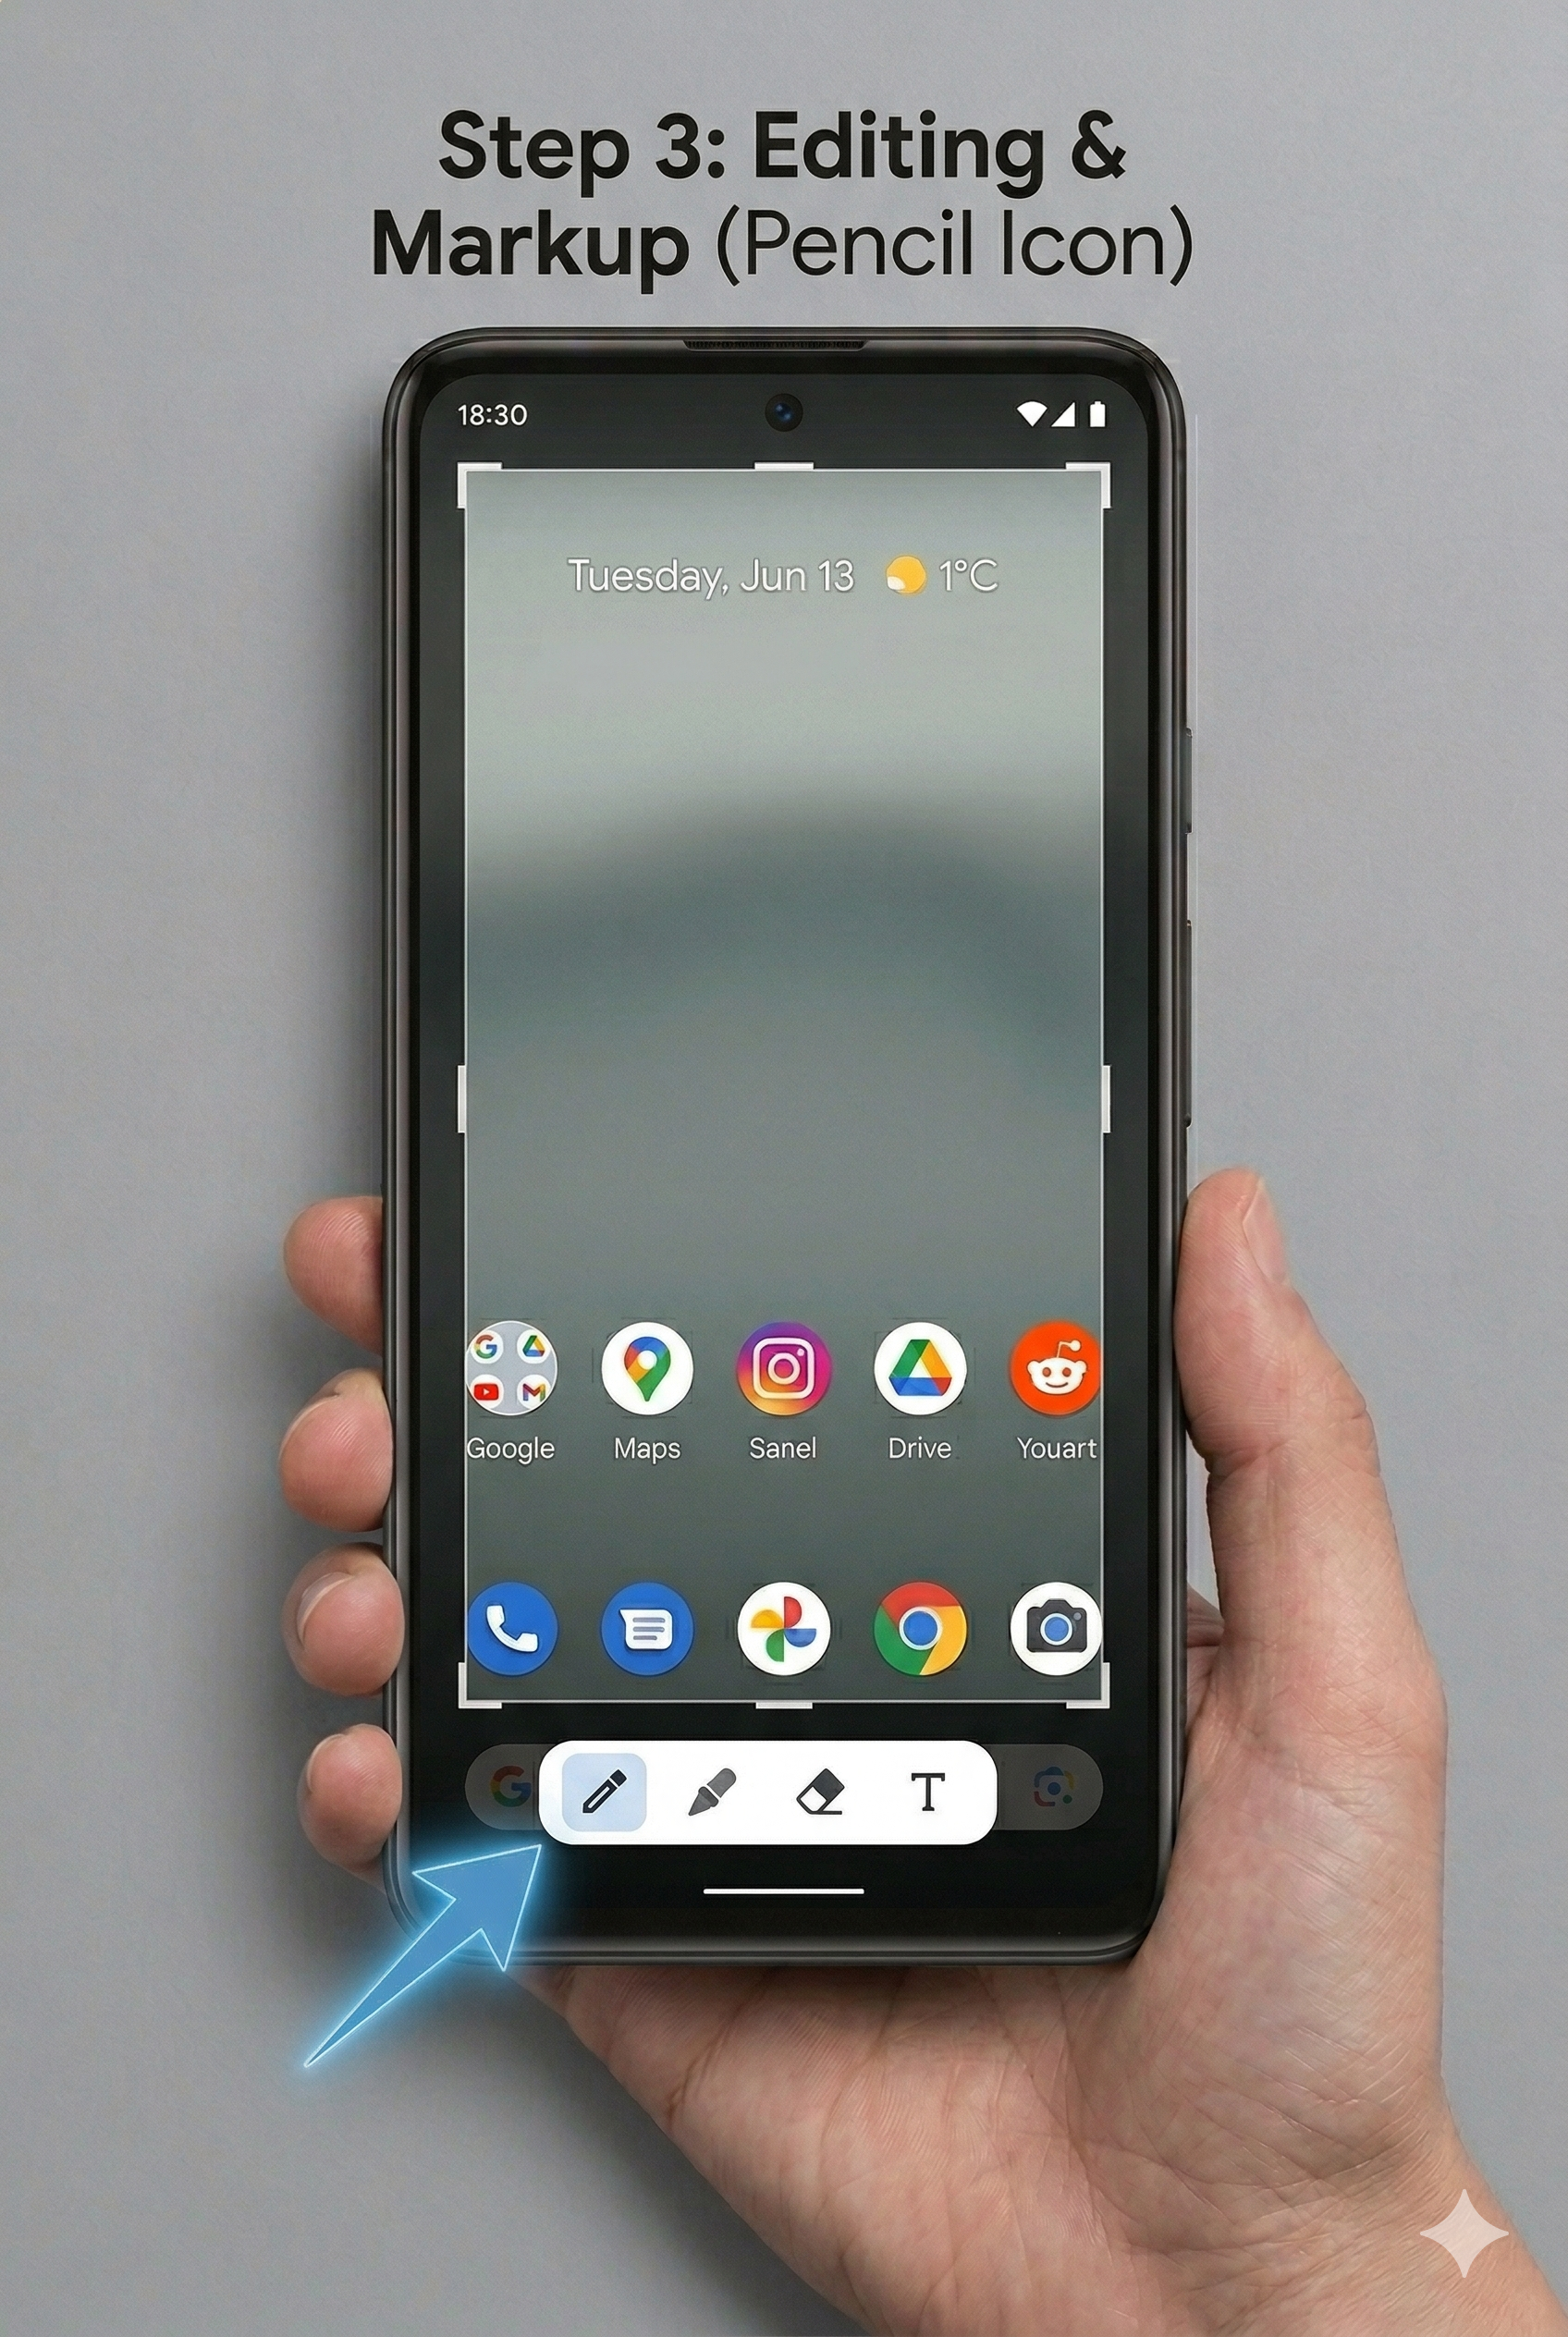
2.3. Edit the Image
- Select the image and then tap the Pencil icon (Edit) on the thumbnail.
- This opens tools to crop, draw with a pen/highlighter, or add text.
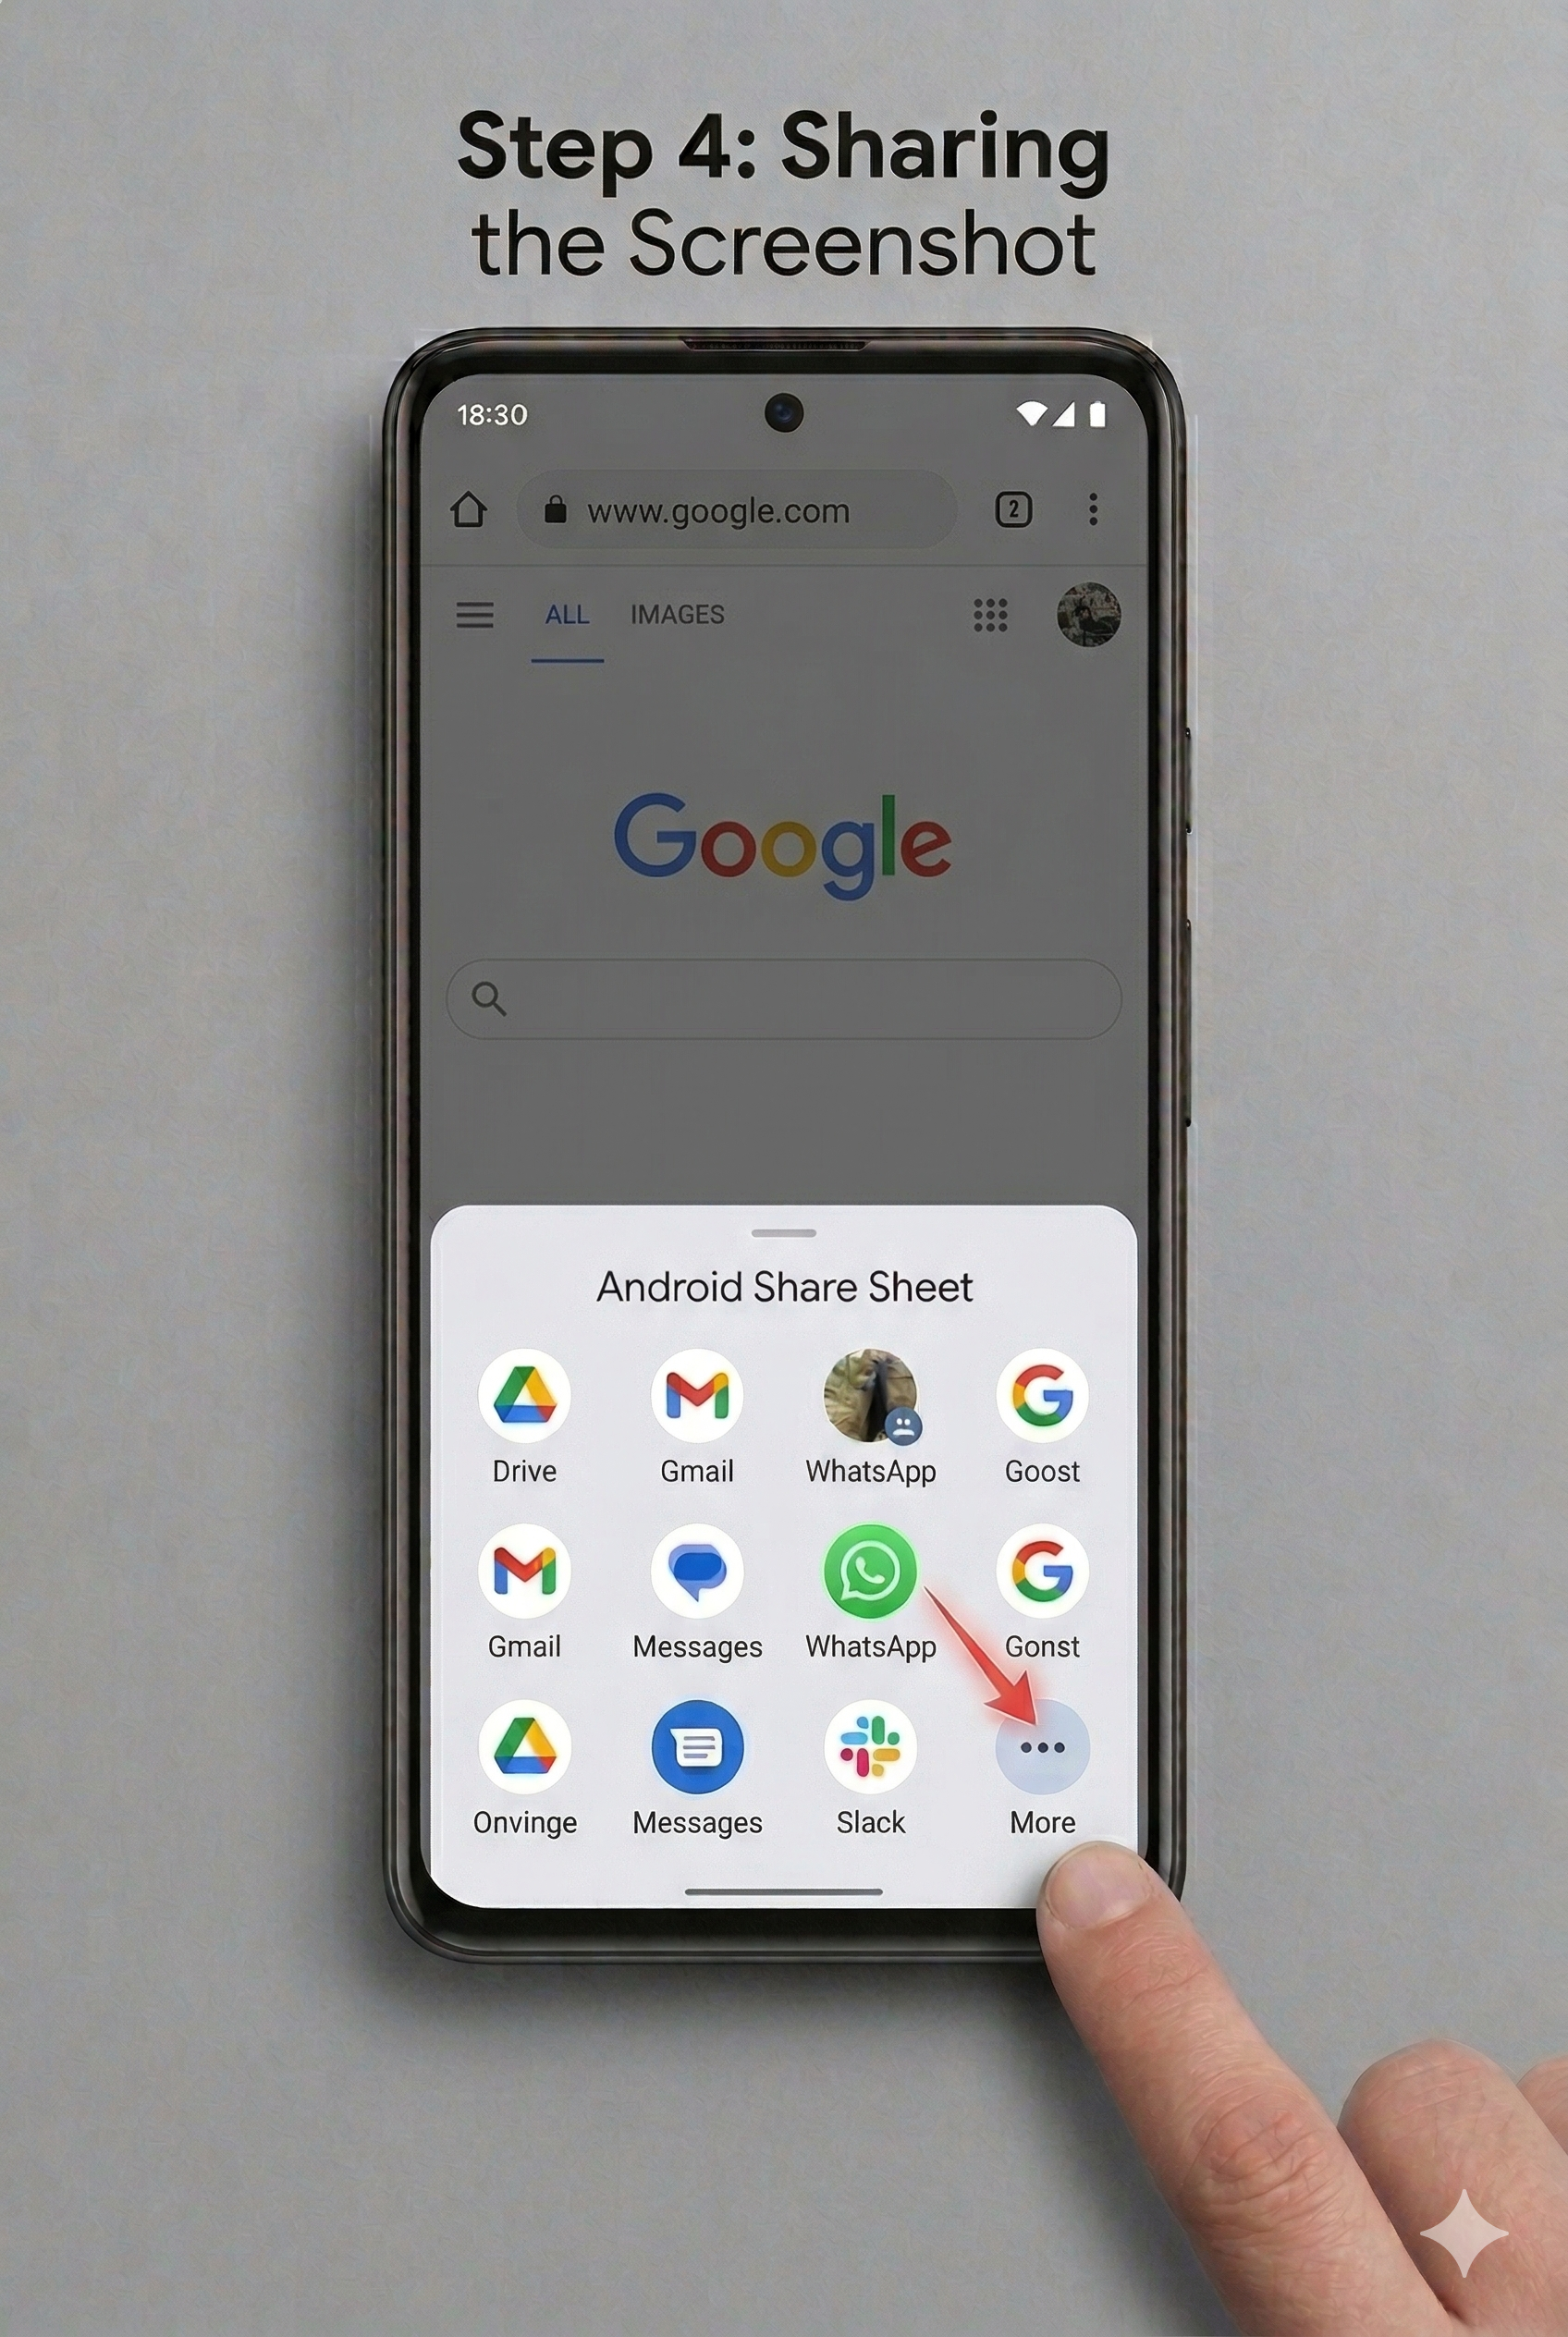
2.4. Share the Image
- Tap the Share icon (three connected dots) next to the thumbnail or within the editor to send it to apps like WhatsApp or Slack.
2.5. Save Screenshot
Raw screenshots save automatically to your Photos > Library > Screenshots folder.
