
")
Windows 10 officially reached its end of life on the 14th October 2025. While upgrading to Windows 11 is the recommended path by Microsoft, many PCs cannot be upgraded due to hardware requirements.
If you cannot upgrade to Windows 11 or would like more time to transition, Microsoft is offering the Extended Security Update (ESU) program to Windows 10 users. The good news for users within the European Economic Area (EEA) is that they can take advantage of this program at no additional cost.
Here is your step-by-step guide to enrolling your Windows 10 PC in the ESU program.
Step 1: Check Your System
Before you start, ensure your PC meets the basic eligibility requirements.
Check your Windows Version: Your device must be running Windows 10, version 22H2
- To check: Go to Settings > System > About and look under "Windows specifications."

Install the Latest Updates: Ensure all available cumulative updates are installed.
- To check: Go to Settings > Update & Security > Windows Update and click Check for updates. Install all available updates. You may be prompted to restart to complete the installation of the updates.
Important Notes:
Administrator Account: You must be signed in to an administrator account to enrol the device.
Microsoft Account: A Microsoft account is required to complete the ESU enrollment, as the license is tied to it.
- What is a Microsoft Account? A Microsoft account is a single set of credentials (an email address and password) used to access all Microsoft online services (like Outlook.com, OneDrive, Xbox, and Office 365). Unlike a Local Account (which is just for logging into your specific PC), a Microsoft Account is a cloud-based identity.
- Local Account Users: If you currently use a local account to sign into Windows, you will be prompted to sign in with an existing Microsoft account or create a new one during the enrollment process.
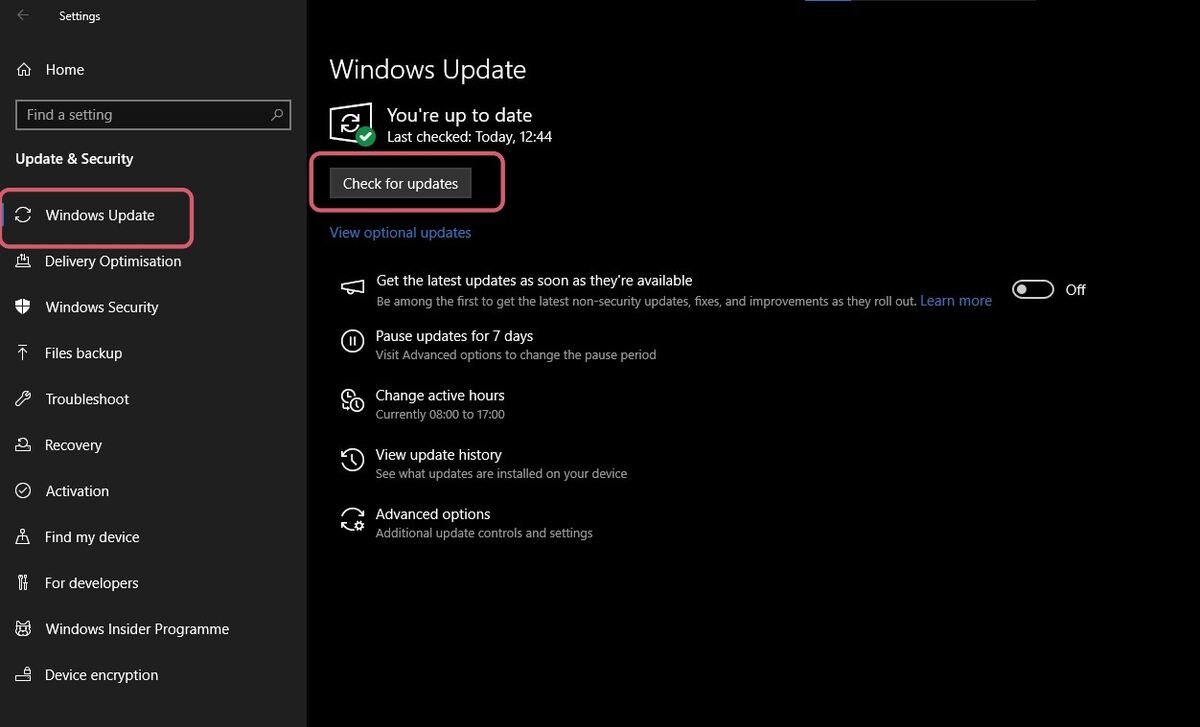
Step 2: Navigate to Windows Update Settings
The enrollment process is managed directly through the Windows Update panel, just like a regular update.
- Open Settings (press Windows Key + I).
- Click on Update & Security.
- Select Windows Update from the left-hand menu.
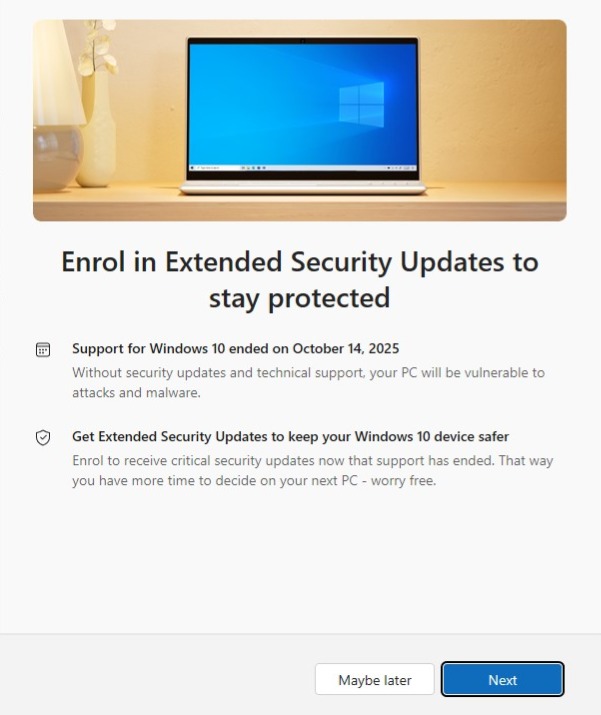
Step 3: Find the Enrollment Prompt
Once your device is up to date, a specific banner or link will appear, inviting you to join the ESU program.
- In the Windows Update window, look for a message near the top regarding Windows 10 end of support.
- You should see a section that says something like "Enrol in Extended Security Updates" with a link "Enrol now."
- Click the “Enrol now” link

Step 4: Complete the Enrollment Wizard
A new wizard window will open. If you are currently using a local Windows account, the wizard will prompt you to sign in with your Microsoft account. Follow the on-screen prompts to authenticate or create a new account.
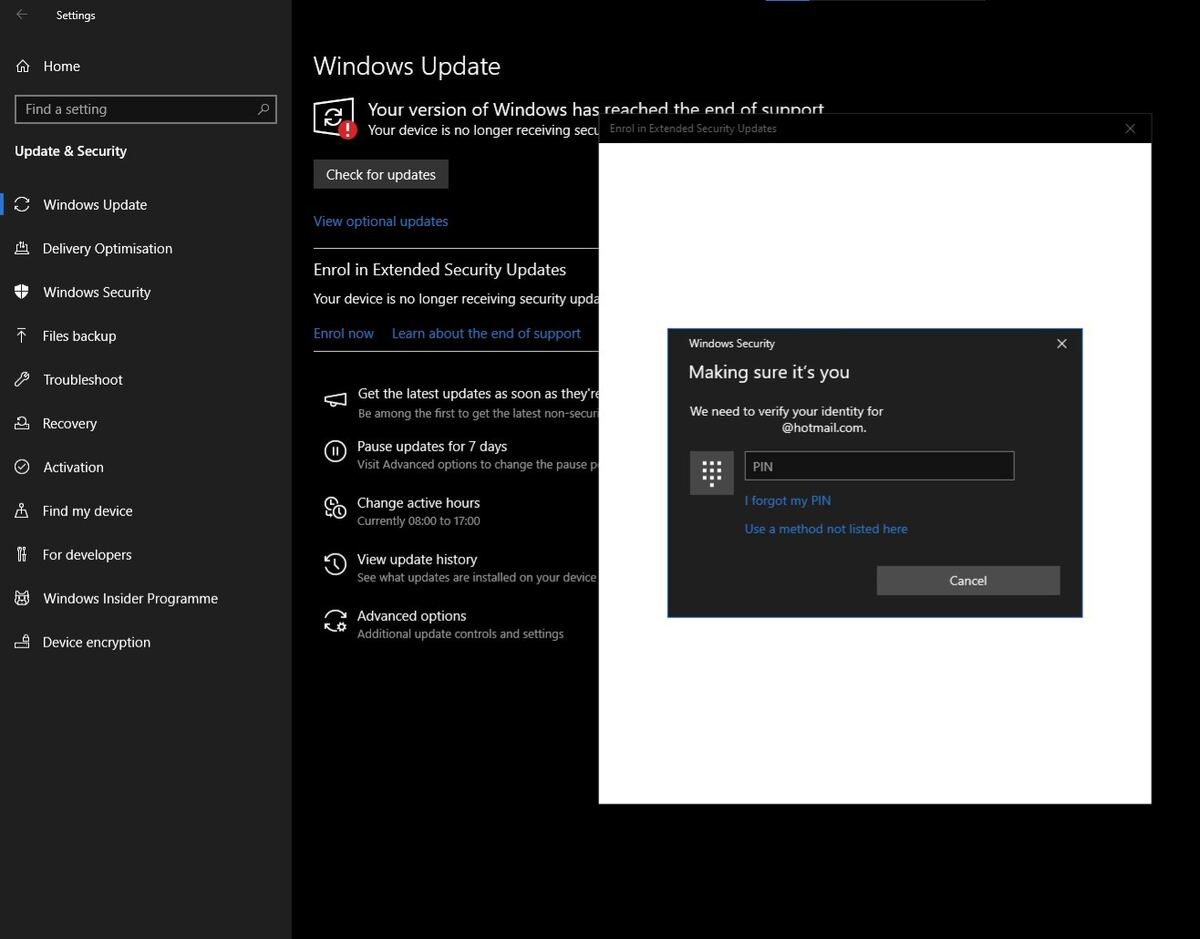
- Once the process is complete, click Done.
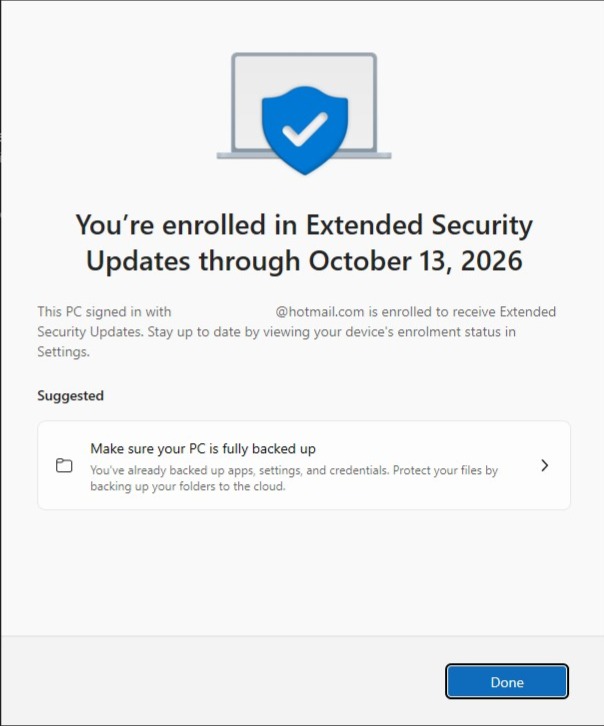
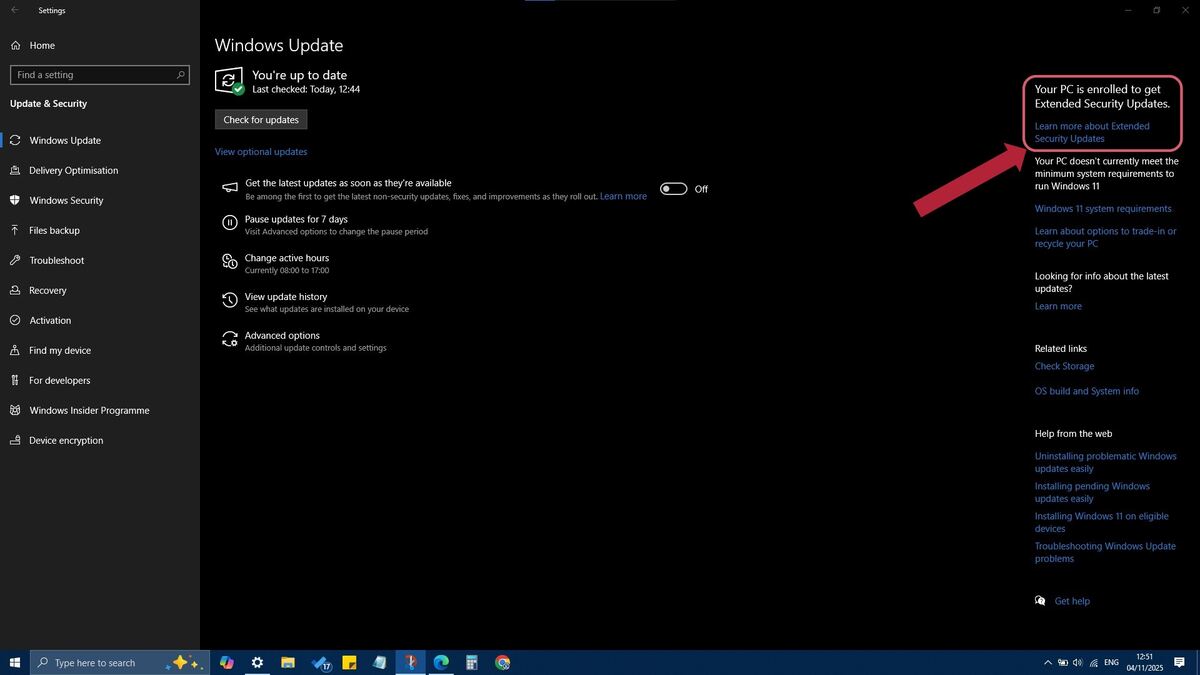
Step 5: Verify Enrollment
After completing the steps, verify that your device is protected.
- Return to the Settings > Update & Security > Windows Update screen.
- Look for a confirmation message, usually at the top of the panel, that states: "Your PC is enrolled to get Extended Security Updates."
And that’s it! You have now successfully enrolled for another 12 months of Windows 10 Security updates. Watch this space for more updates on the Windows 10 ESU program!